The applet allows you to hear multiple rhythms being played at the same time. You might think of each revolution of the triangle as a measure or a bar. If you'd like to hear four evenly spaced beats per measure, you'd enter 0,90,180,270 in the rhythm 1 box since 360/4=90.
If you'd like, you can put a different rhythm in the second box. Say you'd like three evenly spaced beats per measure, you could enter 0,120,240 since 360/3=120. If you'd like you can enter another rhythm in the third box. All will be played simultaneously.
Many polyrhythm traditions have different rhythms come together at the beginning of each measure, but this isn't required.
If you'd like to add an extra emphasis or accent to a particular beat, enter its degree in the emphasis box and a beat at that degree will be louder.
The Radio Shack Mini-Amplifier and Speaker was a staple of the Exploratorium Teacher Institute, used in a number of activities (which we call, "Snacks").
It was an inexpensive, fairly loud, if somewhat garbled external speaker. Its main feature is that the internal amplifier will amplify the tiniest of signals that most other amplifiers ignore. It made the beige wonder a bit squacky if a connection was poor. You can find it used in older versions of Modulated LED where a solar panel is connected to its auxillary input. With the demise of Radio Shack, the Mini-Amplifier and Speaker has also gone away.
We first tried computer speakers as a replacement, but they don't work well. In order to get more clarity and less hum, they cut out low amplitude signals. The signals that we are picking up from solar panels are teensy, so in these won't work.
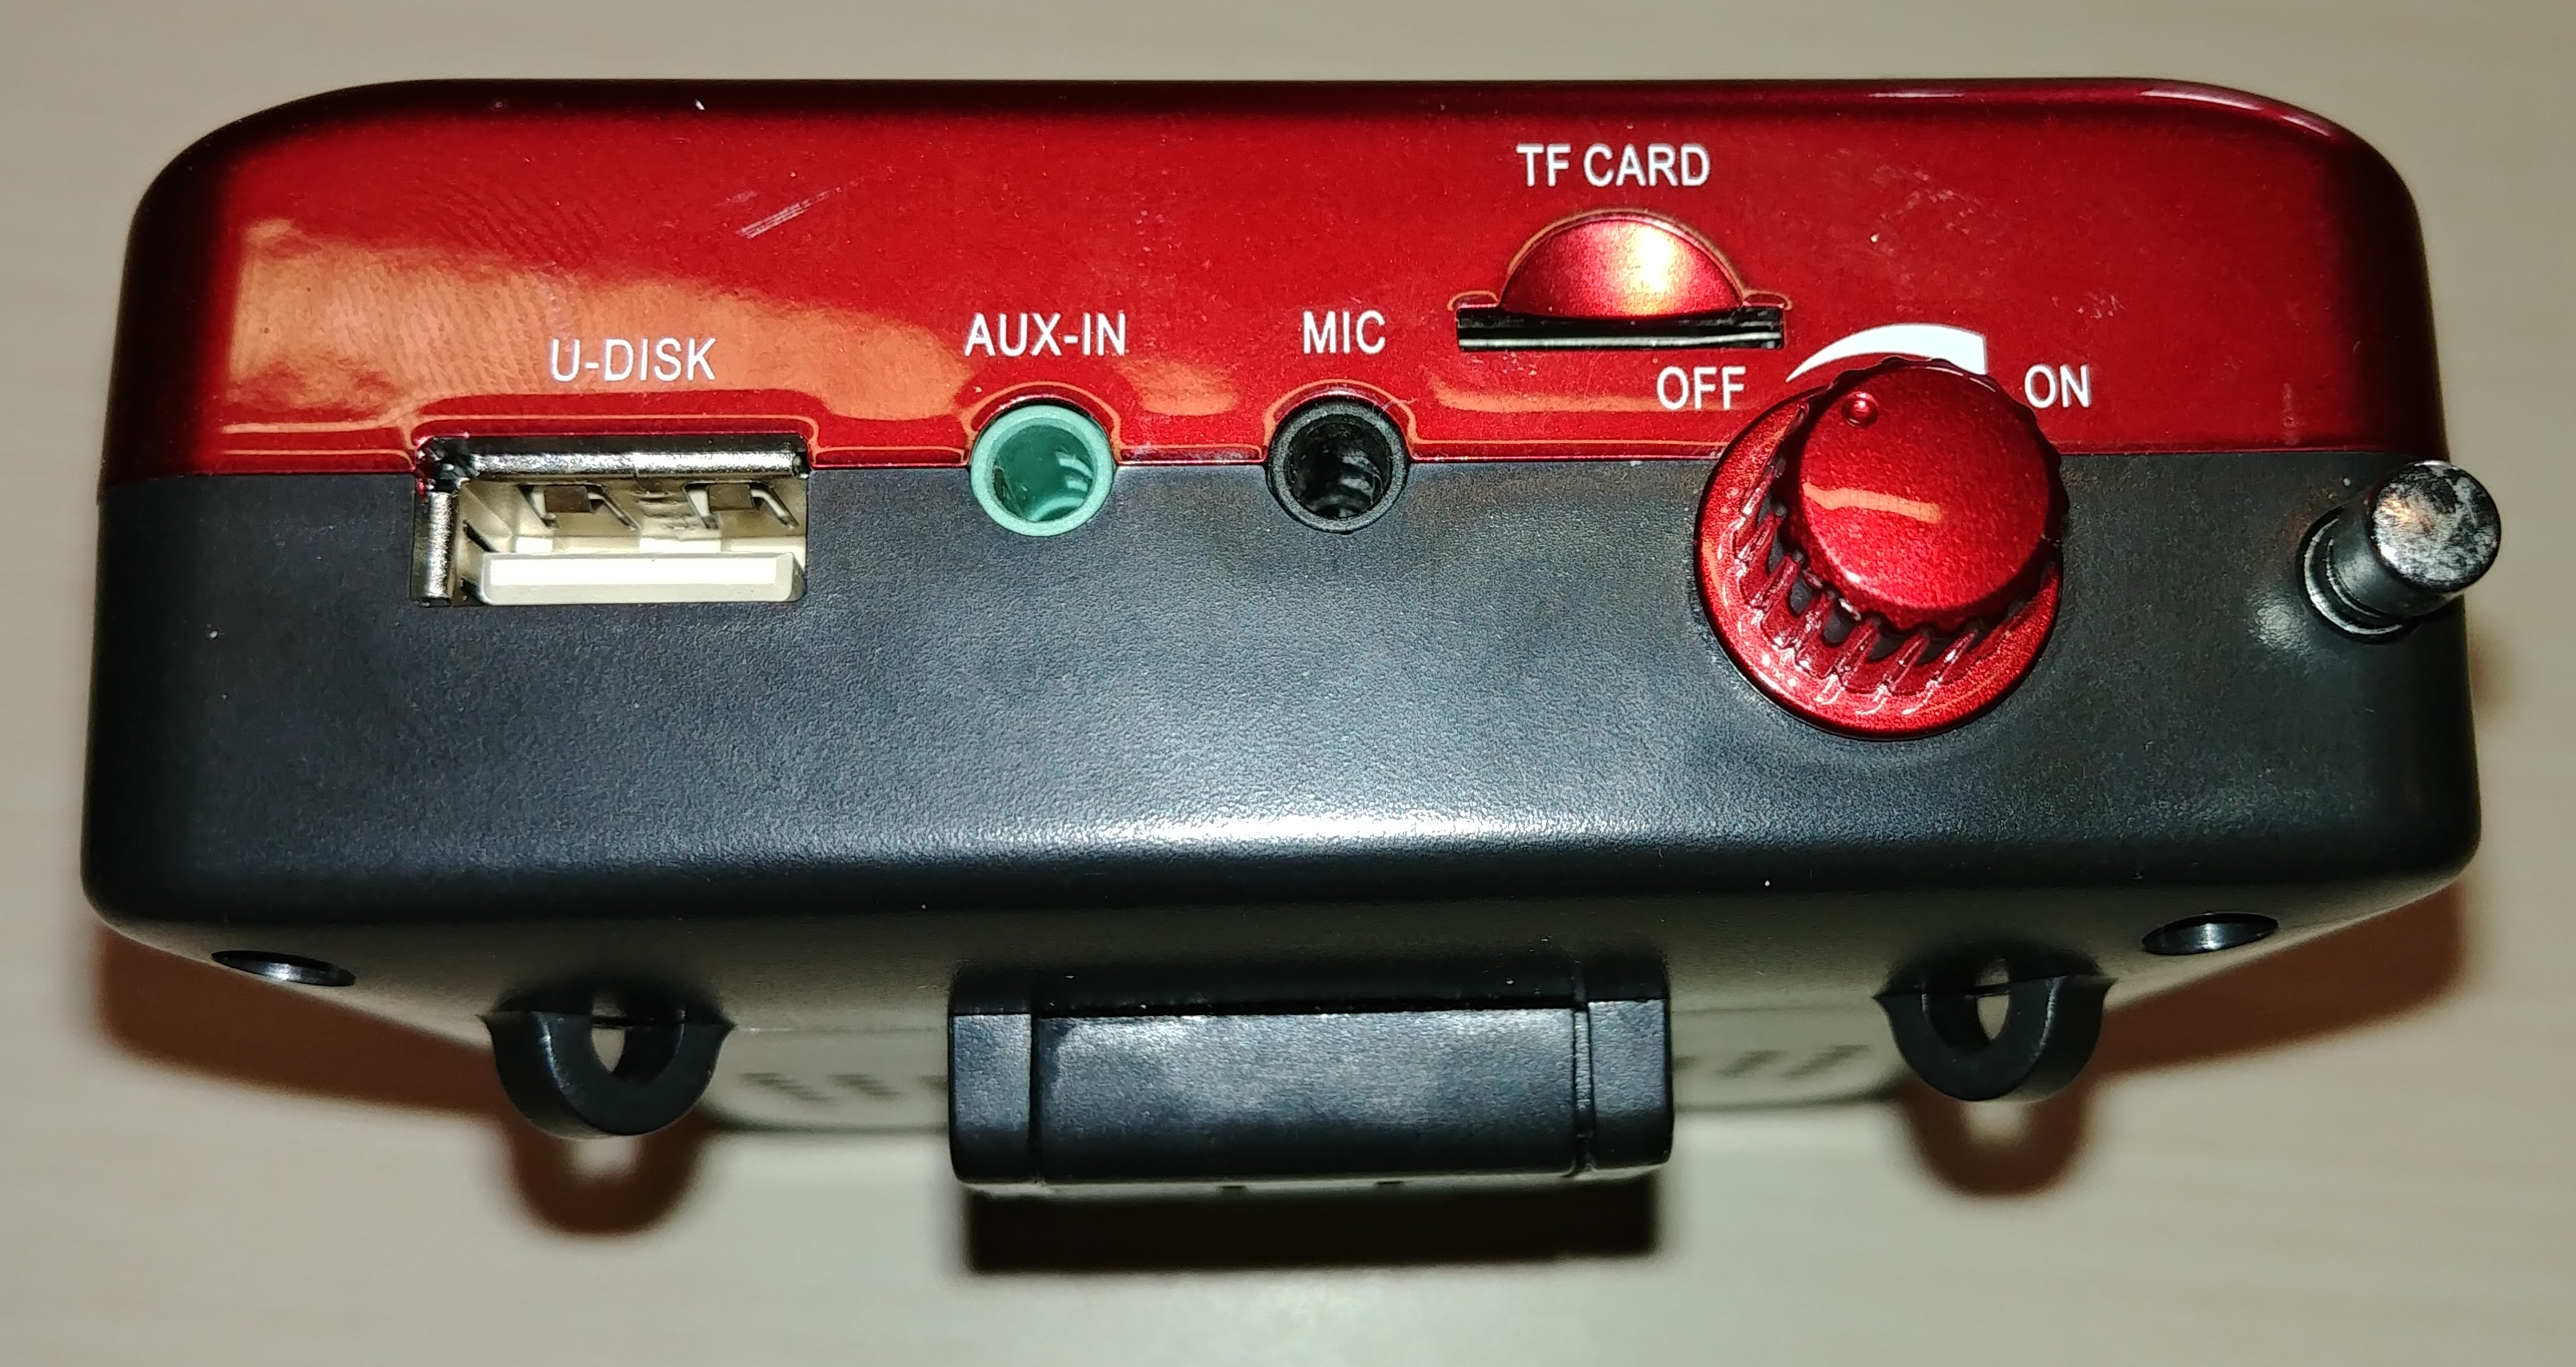
There is a replacement, however, which works well. You want a voice amplifier, a device that is often used by people who need to have more voice but not a full PA. You can find them on Amazon for between $20 and $30. You can often find them for less, sometimes, at your local DJ supply outlet. I got the one below for $15 at an electronics store in a downtown Los Angeles.
The key feature that you are looking for is a microphone input. Obviously things that come with microphones will have one, and see the part that says "MIC" below? That's the ticket. Microphones have tiny voltages and so the internal amplifiers need to be extra sensitive.
You can really see the difference in this model. Plug the solar panel into the AUX-IN, and the speaker produces no sound, while plugging into the MIC works perfectly.
Botanical extractions are pretty delicious, but they require patience. I'm not good with patience.
Dave Arnold pioneered using a whip cream siphon to extract quickly flavors from botanicals. He writes,
You can infuse flavors into liquor (and water based things, too) almost instantly with nothing more than an iSi Cream Whipper . You can use seeds, herbs, spiced, fruits, cocoa nibs, etc. Here’s how:
Put room-temperature booze into the cream whipper. Add herbs, seeds, whatever. Close the whipper and charge it with nitrous oxide (N2O –the regular whipped cream chargers). Swirl gently 30 seconds and let stand 30 seconds more. Quickly vent the N2O out of the whipper, open it, and strain out the infusion. Done.
The science behind this is pretty interesting. Extraction can only happen where the alcohol touches the material. Chopping it into finer bits helps by making more surface area, hence grinding coffee.
Finer ground increases the area for extraction.
You can do better than this, though. Lots of plant material have tiny pores in them that zigzag throughout, increasing their surface area. Alcohol, though, can't get into these holes because they are so small. Imagine a single drop of alcohol. If a hole is much smaller than that drop, then alcohol will have a hard time getting in. Additionally, the holes are filled with air, and it has to get out before the alcohol can get in.
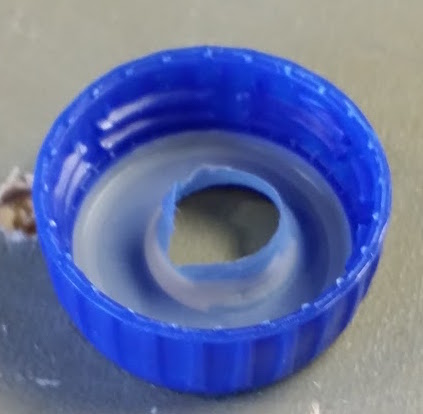
Showing this can be a challenge. The botanicals and their pores are so small, but I can show you a model of what is happening. Here's a pipette. I sucked in some blue dye, than I sealed the big hole in the bottom with hot glue. Last, I poked a bunch of holes in the side with a thumb tack. Even though you can't see it there are holes where the dye is.
Poking tiny holes with a thumb tack.
I can put the dropper in bottle filled with liquid and the dye doesn't come out.
Don't get me wrong: liquid can slowly make its way into those holes just like it can in the pores in coffee or orange peel, tiny bit by tiny bit, with air slowly dissolving out through diffusion. It takes a long time. Patience is required.
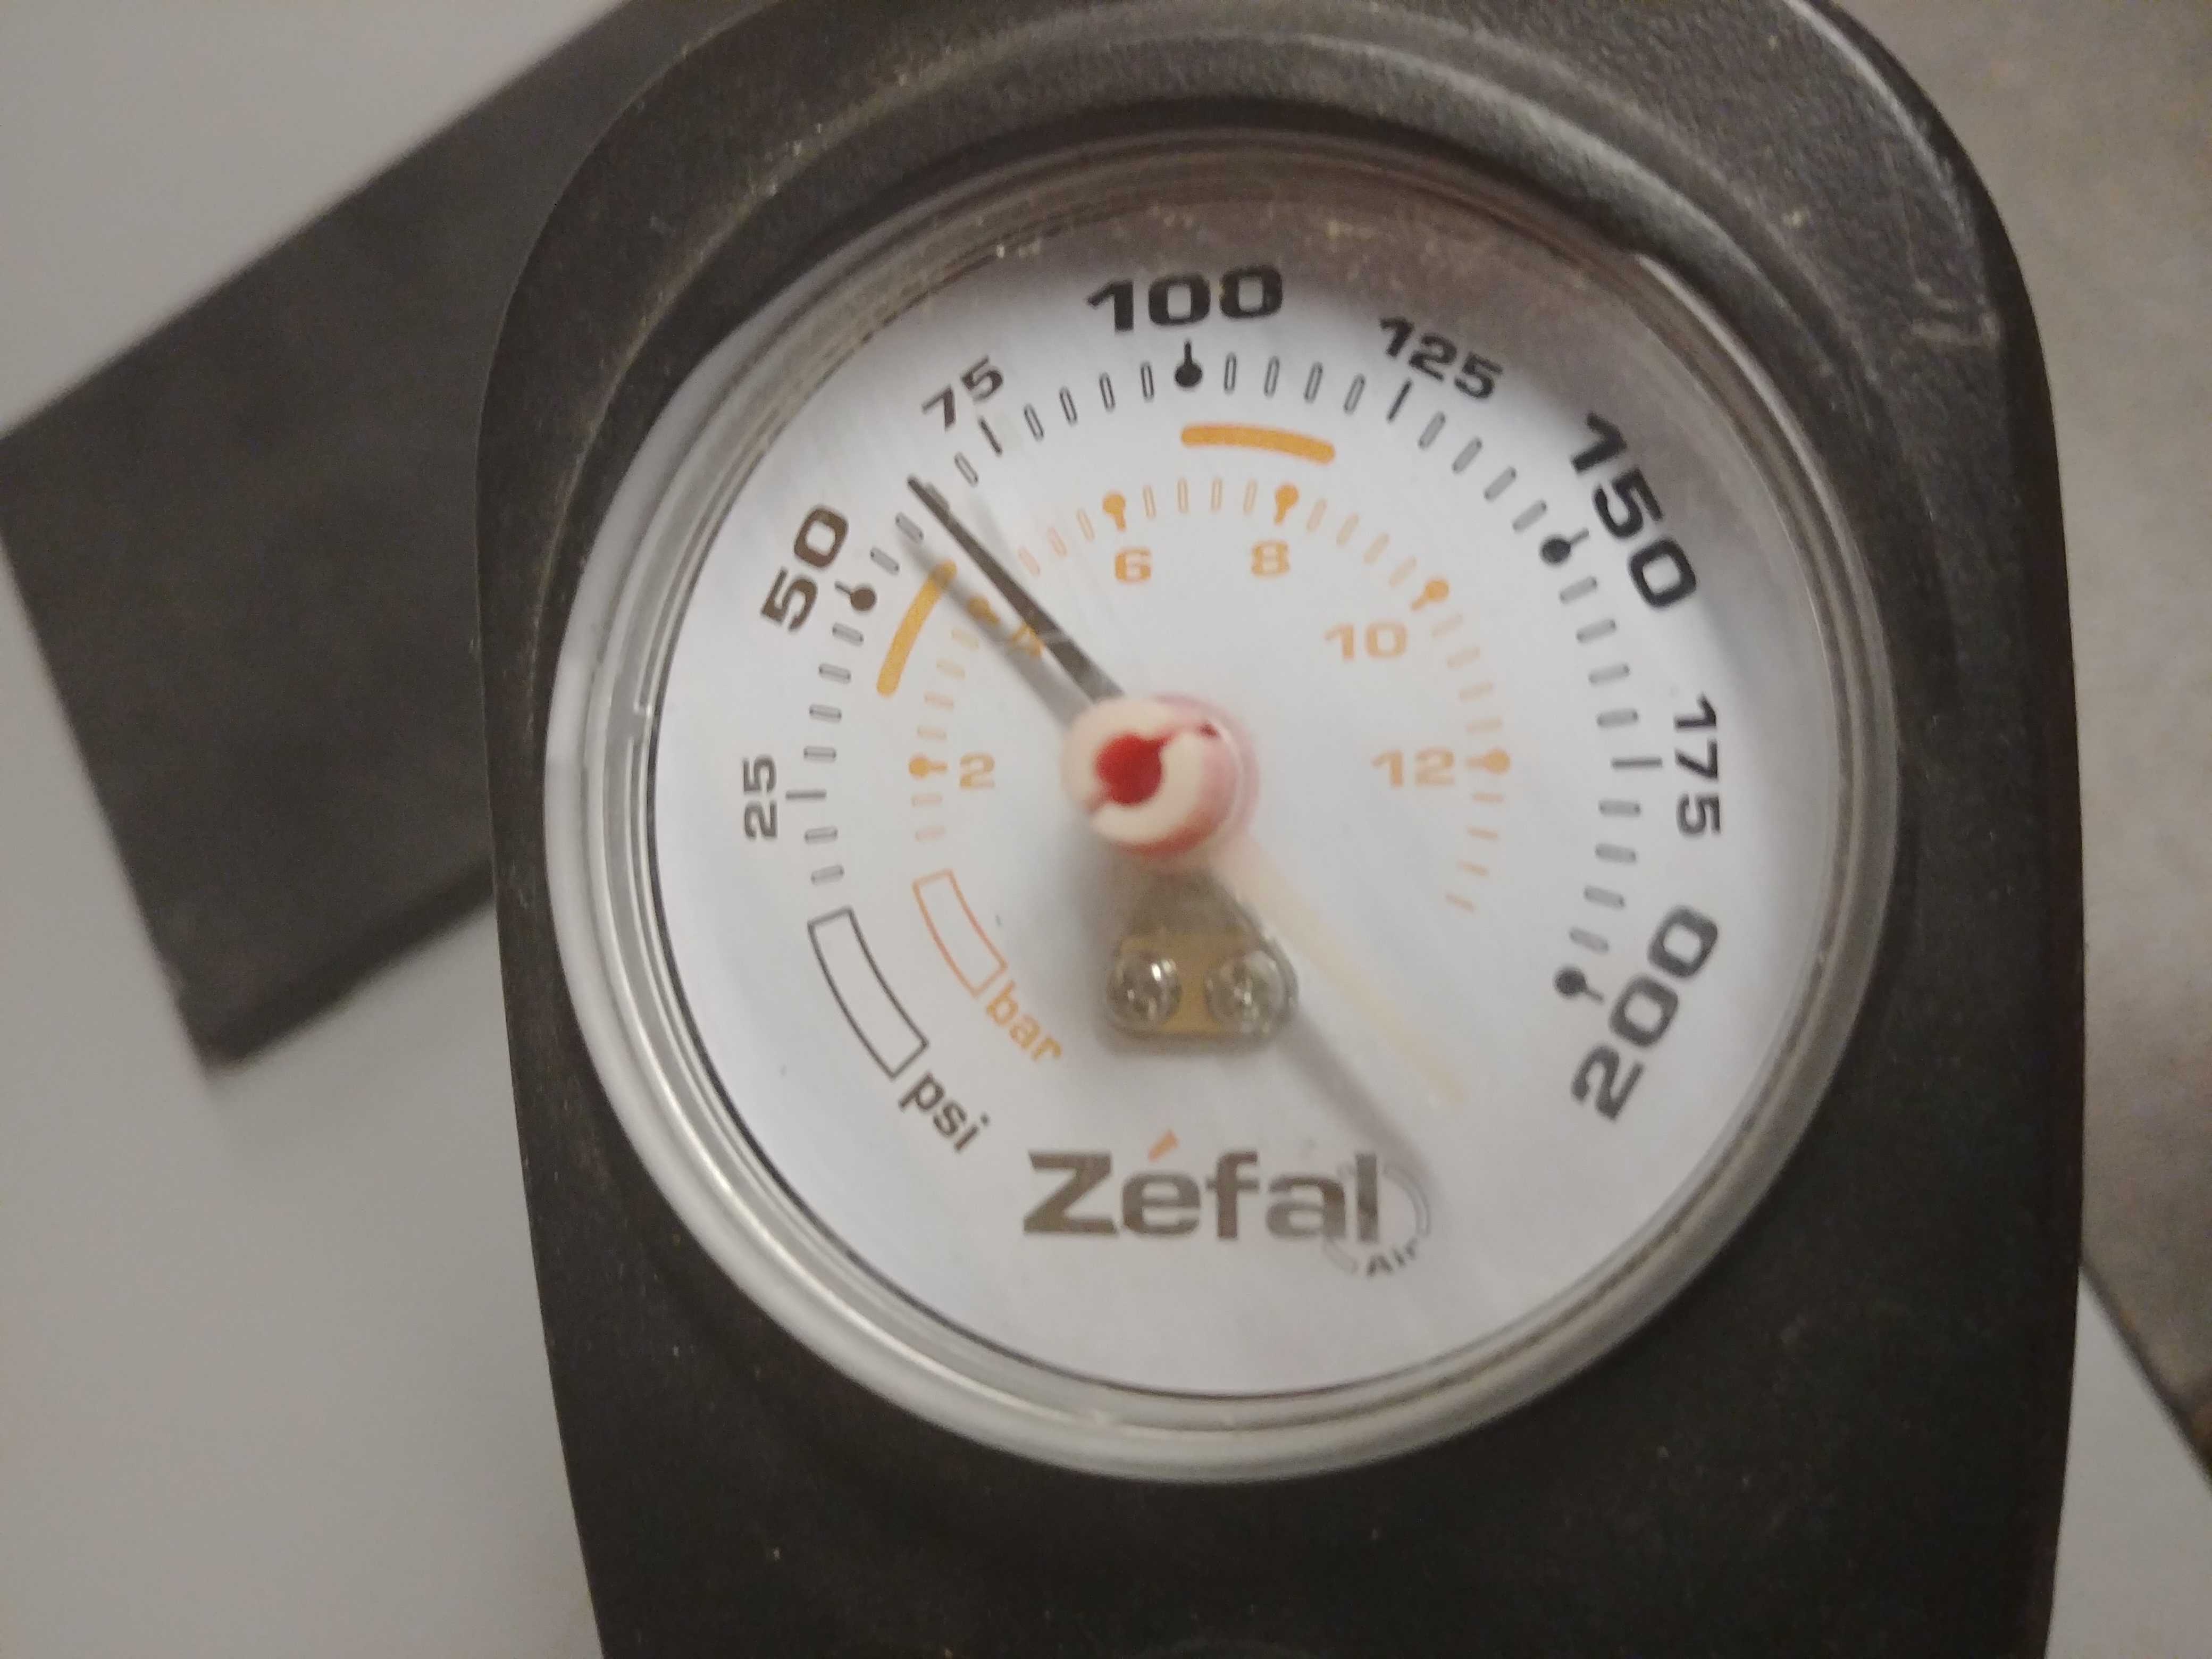
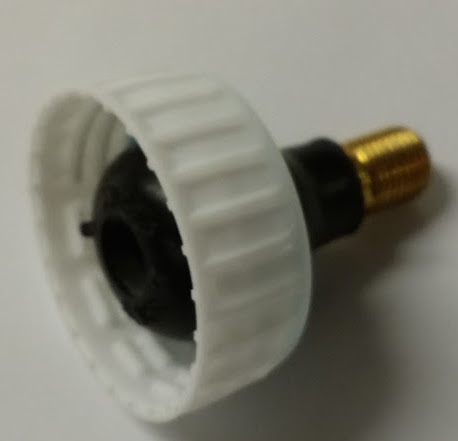
What if you don't want to wait? You can try to shove the alcohol in harder. Pushing on a liquid is hard, but we can use air pressure to do the pushing. At the top of the bottle you can see a tire valve built into the cap. I can use a bicycle pump to increase the pressure in the bottle, pushing on the water and shoving it through the tiny holes into the pipette.
Under pressure Pressure inside the bottle pushes water into the pipette.Put alcohol and the botanicals inside a pressure vessel (like an iSi siphon) and increase the air pressure above the liquid. The air pushes on the liquid which then is pushed into the holes. Now we can use more of the surface area.
While the pressure in the bottle is significant, it isn't high enough to squish much alcohol into our botanicals. We need more than 10X atmospheric pressure. For that we have have a whipper. We put the botanicals in the iSi and then use nitrous oxide to pressurize the container. We could use carbon dioxide but that leaves the food tasting sour until the carbon dioxide escapes. Nitrous oxide has less flavor. Some people think that it tastes mildly sweet.
Getting the liquid back out with our flavors is even easier: open the pressure vessel. When the liquid went into the pores, it didn't actually push most of the air out of the holes, instead it compressed the air. Once the pressure is released, the gas expands pushing some of the liquid back out.
small nut with an inside diameter about the same size as the shaft of the pipette
glue gun
bicycle pump with pressure gauge
Construction
Put on safety glasses.
Remove the label.
Measure the diameter of the neck of your Schrader car tire replacement valve. Use the step drill to drill a hole in the cap and through the rubbery liner that is one step smaller than the valve.
Trim the liner but don’t remove it. It makes for a better seal.
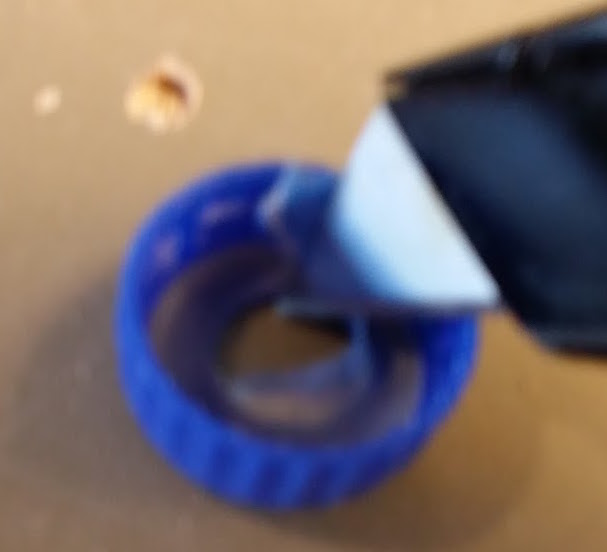
Push the Schrader valve into the cap like in the picture. This is easier said than done, but keep working at it.
(Food coloring stains. Do the next two steps over a sink.) Draw a couple of milliliters of food coloring into the pipette. Tap the pipette against sink to settle the ink into the bulb.
Hold the pipette so that the openning is upwards. Squeeze the bulb so that ink in the shaft is squirted out. Then put a drop of hot glue on the opening and release the bulb. Hot glue will be drawn into the end sealing it off.
Slip a the nut over the shaft and bring it near the bulb. Hold it in place with a dab of hot glue underneath.
Turn the pipette so that the bulb is on the top and allow the food coloring to slip back to the bottom. Poke several holes in the pipette above the line of the food coloring.
What to Do and See
Fill the 1 L bottle with 900 mL (approximately) of clean water.
Set the pipette in. Does water go into the holes you poked? Would it eventually?
Screw the cap on the bottle tightly. Attach the bicycle pump. Put on your safety glasses.
Pull up on the valve to make sure that it is seated to seal.
Use the pump to increase the pressure in the bottle to 25 PSI. Does water go into the pipette?
Pump a couple more times to increase the pressure to 50 PSI. The bursting strength for most bottles is over 100 PSI, but no reason to get close as the activity works just as well at 50 PSI. If the bulb looks collapsed, be a bit patient. The bulb will expand when the pressures are balanced. You should notice that the pipette is full of fluid.
Disconnect the bicycle pump. Release the pressure by pushing on the stem in the valve. What happens to the liquid in the pipette?
The Exploratorium's Teacher Institute calls small science activiites "Snacks". These activities are tried out with students and teachers and have all the information you need to make them work. The instructions are 100% free, and we don't sell parts or kits. If you need help finding something, well, that's part of my job.
These days I work for the Exploratorium, so much of my work now ends up here. The work doesn't have my name on it, since we work collaboratively, but some I helped bring to the page.
Things don’t fall when their center of mass is over their base
Recommended Grade Level: 6 to 12
NGSS Science & Engineering Practices
•Asking questions and defining problems
•Developing and using models
•Planning and carrying out investigations
Time: 30 minutes in class, 2 hours to make the first time
Materials Needed
(per group)
3 12 x 24 x ¾ inch plywood boards
1 x 12 x ¾ inch plywood strip (You may be inclined to use some other wood, but plywood is especially resistant to splitting.)
½ x 12 x ¾ inch plywood strip
8 1 ½ inch drywall or wood screws
12 inches 2 or 2 ½ inch PVC pipe
24 inches 2 x 2 inch (actually sized 1 ½ x 1 ½ ) cut into two 12 inch pieces
Background Information
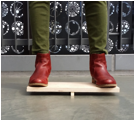
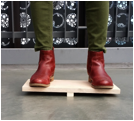
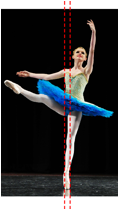
When dancers balance they need to keep their center of mass over their feet. When they are on they are on their toes or hands, this becomes especially hard since the area is much smaller. This is a way for non-dancers to get a sense of how difficult that is and is similar to a way that some dancers practice.
To Do and Notice
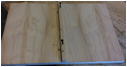
1.Attach the 1 inch wide strip of plywood to the center of one of the plywood boards using drywall or wood screws. Drilling 1/8 inch pilot holes in the strip before you put in the drywall or wood screws will greatly decrease the risk of splitting the strip. Using wood glue along with the screws will make a stronger, longer lasting joint. Twist the screws enough to set them below the surface to avoid marking you floors. Repeat with the ½ inch strip.
2.Try to balance on one board then the other. How are the two boards different?
If you need to save space, you can build a single balance board with one strip on each side.
3.What are you doing to keep your balance? If you use the expression “shifting your weight”, what do you actually mean by this in a physics or biomechanics sense?
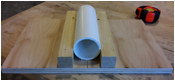
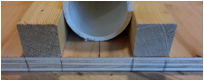
4.Time to build the last balance board. Find the center of the third board. Place the PVC pipe in the center. Space the two 2x2’s so that they hold the pipe in place. Mark the edges of the 2x2’s on the board. Flip the board over and drill two 1/8-inch pilot holes for each of the 2x2’s. Screw in the drywall or wood screws from the topside into the 2x2’s. It won’t hold the PVC pipe from falling out, but it will keep it from rolling.
5.Have a person try to balance on the PVC pipe board. Most will find it much more difficult. Why is it harder?
What’s Going On?
·To maintain your balance you need to keep your center of mass over your base. The wider base is easier since it gives you more chance for error than the narrower base. Once you get your center of mass at rest over the base, you will stay balanced as long as your center of mass stays there. This is called “passive stability”.
·The pipe is much harder to keep your balance on because its “base” is very, very small, so there is virtually no way to keep your center mass over the base. You will be on one side of the base or the other, and you will have to move actively your center of mass back and forth. This is called “active stability”.
·Dancers have to maintain their balance over their feet. So since she extended her right leg and to a smaller extent her right arm, she needs to lean to her left to make sure that her center of mass stays over her feet. Notice that her left arm is straight up. Why doesn’t she want to extend it away from her body (to her right) like her left arm?
Going Further
Surprisingly, you can make the pipe board harder to balance on by making the pipe smaller. If you make the board with ¾ inch PVC pipe instead of 2 ½ inch, it will be the same height as the other balance boards. And it will be nearly impossible. There are several reasons why it is more difficult but the main one is distance and time. With a smaller diameter pipe, the board end of the board will be closer to the floor, meaning that it will touch sooner. This gives you less time to correct for being off in your balance.
References
Ballet picture by Harclade, Used with Permission. https://www.flickr.com/photos/harclade/5932310173/in/set-72157626955587005/
Inkjet Printer Ink Bulk Refill (like this pack of BCH inks from Amazon) Most of the packs come with 100 mL of cyan, magenta, and yellow ink as well as 300 mL of black ink.
Crayola Marker Refill Kit (like this kit from Amazon) The kit comes with 12 blank markers.
Small (approximately 10 mL) clear plastic cups.
Set Up
Discard the ink that comes with the Crayola kit. It works okay, but the bulk printer ink is much purer in color.
Each pen consists of a barrel, a nib, a foam cylinder, endcap, and regular pen cap.
Place the nib into the barrel and then insert the foam cylinder. Use a pen to push the foam onto the nib.
Open the ink bottles. You won’t need the black ink. You can set them aside.
Using a long needle and syringe that came with the ink, extract 2-3 mL of ink from the cyan bottle.
Press the needle just below the surface of the foam and push down the plunger slowly.
You’ll see the ink move down the tube via capillary action.
When the ink reaches the nib (usually takes a few minutes), test to be sure the pen works. If so, press the endcap onto the barrel. You’ll hear an audible click. If the pen doesn’t work, you should add another milliliter of ink.
Repeat with magenta and yellow.
Wash out the syringes and needles with plenty of water.
Do and Notice
Make three overlapping circles of cyan, magenta, and yellow to make seven regions. Notice that where cyan and yellow overlap, you get green; where cyan and magenta overlap, you get blue; and where magenta and yellow overlap, you get red. Where all three overlap, you get black (or at least a really dark color).
What color would you get if you mixed yellow and blue? You don’t have a blue marker? No big deal. Make one. In a small cup add 2 mL of cyan ink and 2 mL of magenta ink. Mix. Add that to a blank marker.
Place 10 mL of water in a clear cup. Add a drop of yellow ink. Add a drop of magenta ink. Mix. Note the color. Add another drop of magenta ink. What color is that? Notice that you can mix different inks together to get many different colors.
Notice that adding ink always reduces the amount of light getting through, adding water allows more light to get through.
What Is Going On
Michelangelo was once asked (perhaps, appocyphorally) how he carved David. He said that he started with a block of marble and removed everything that wasn’t David.
Let’s say that you want a green splotch on a piece of paper. You are probably doing this in white light on white paper. (You might consider how they’d be different if you were in green light.)
White light contains all hues that are available to your eye. So, you already have green light hitting the paper. However, you also have red, yellow, chartreuse and many, many more hues along with the green light. You need to subtract all the other colors.
Is there an ink that subtracts the red to yellow region of the spectrum? Yes, that color is called cyan. Pure cyan would only let blue to green through. So if you put cyan on the paper, only blue and green light could be reflected.
However, you don’t want blue and green light, you want just blue. Is there a color that removes green blue light? Yes, that color is yellow. Yellow lets green to red through but absorbs other colors.
So, if you put a layer of cyan down and a layer of yellow down, only the green light from the all the hues in the original white light can get through.
Only red can get through magenta and yellow, and only blue can get through cyan and magenta. No color can get through all three.
More Advanced
What if you want orange? Orange is in between red and yellow. We want all the red light from the white light, but only part of the green light, and none of the blue light. Pure yellow ink will block all the blue light so we’ll use it. If we use dilute (or only cover half the surface) with magenta ink, it will block only some of the green light. So, if we use pure yellow and dilute magenta we should be able to make orange ink. Other inks can be generated by combining different amounts of yellow, magenta, and cyan inks.
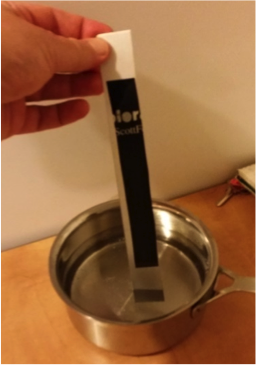
As liquids cool (lose kinetic energy), their temperature goes down, as you might expect, but when they reach their freezing point and turn from liquids to solids, they continue to lose kinetic energy to their surrounding but their temperature starts to level off and reaches a plateau until the material becomes a solid.
How do I know that the system is still losing heat if the temperature isn't going down? The surrounding area is heating up! If you measure the surrounding area, you will see that it's temperature keeps going up even though the temperature of the liquid turning into a solid is staying the same.
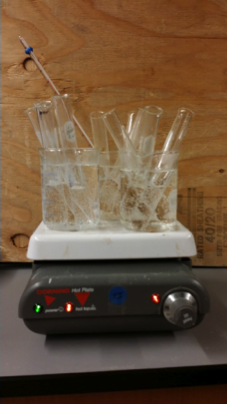
Water does this in a freezer and a thermocouple probe that you snake out the door and stirrer can show it. Boston in the winter works as well. Still, students often thing that this a special property of water and not generally true of liquids. So, it would be good to have another liquid to show.
Lauric acid melts/freezes at 43 C or 110 F; so, it makes a good additional example to water to show freezing curves.
Materials
(per lab group)
16 grams lauric acid
Test tube (large)
2 thermometers (digital or analog)
Styrofoam cup
Ice water to fill the cup
Holder for the cup (i.e. ring stand, larger beaker, cup filled with sand)
Graph paper and paper for notes
Stopwatch
Test tube tongs/holder or hot gloves
(per room)
hot plate
250 mL beakers (three or four test tubes will fit in each beaker)
thermometer
Set Up
Fill a large beaker with ice and water and allow to come to 0 to 5 C.
Put 16 grams of lauric acid into each tube. I usually make a couple of extras.
Place test tubes into a beaker. Each will hold about four test tubes.
Fill the beakers with water so that they are a water bath until a couple of centimeters below the rim.
Place the beakers on a hotplate. Put a thermometer into the water. Allow the water to reach 80 C.
Procedure
Use a ring stand, a larger beaker, a cup partially filled with sand, or some other method to keep the Styrofoam cup from tipping over.
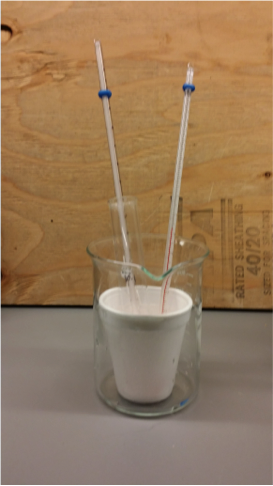
Fill the Styrofoam cup with 0 to 5 C water. Do not put any ice into the water.
Place a thermometer into the water. Record the temperature.
Place a thermometer into the lauric acid test tube. Record the temperature.
Make a data table with 30-second intervals to record the temperature of the lauric acid as it cools and the water as it warms.
Place the test tube into the water. Work carefully and quickly.
Record the temperature of both the water and the lauric acid each 30 seconds. A good plan is to divide up the work. Continue until the water reaches 30 degrees or 20 minutes has passed.
Plot the data. (Sample data at the end)
Things to Notice
As in most phase change situations, there is a plateauing region on the graph. This is where the lauric acid is freezing – going from a liquid to a solid. While the temperature of the lauric acid is barely changing, notice that the water is still heating. Compare this heating curve to the curve after the lauric acid is a solid. Notice how the heating curve at that point is nearly flat, indicating that little thermal energy is entering the water.
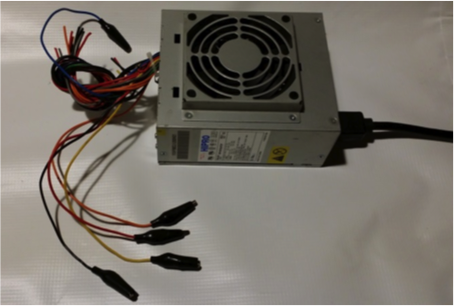
Many PC desktop computers use a power supply known as ATX http://en.wikipedia.org/wiki/ATX . These computer power supplies are surprisingly well made, nearly bulletproof, since computer components are notorious for being easily damaged by getting voltages over or under what they are expecting. Manufacturers go to great lengths to make them durable and close to specs.
And the specs are often fantastic. Most can supply 3.3 V up to 10 A, 5 V up to 20 A, and 12 V up to 10 A. Most have several output wires, so you could have several students use the same supply as long as they together stayed under the current limits. Best of all, most will automatically turn themselves off if your circuit tries to draw too much current. Unplug the power supply, wait 30 seconds or so, and plug it back in, and the supply will be as good as new. No more replacing fuses!
Since power supplies rarely go bad in home computers and they are easy to extract, you can have a ready source of power supplies for more or less free. Surplus houses often sell them for only a few bucks each, if you’d like to go for new.
Their only real downside is that they don’t supply variable current, only fixed levels, but if 3.3 V, 5 V, and 12 V work for you, then they are great.
Materials
ATX power supply
IEC power cord
scissors
soldering iron
solder
electrical tape or shrink wrap
wire stripper
two incandescent holiday lights
four alligator clips with vinyl jackets
Assembly
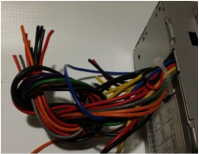
Cut off the connectors from the ends of the power supply using a pair of scissors. Leave the wires long, though. You can tie them into a knot to keep them out of the way.
Find the green wire (there is usually only one) and a black wire (there are usually several). Strip the black and green wires and solder together. When the green wire is connected to ground – say by pressing a button – that signals the power supply to turn on. While you could connect a switch to the supply here, it is easier to turn it on permanently and turn it off by unplugging it.
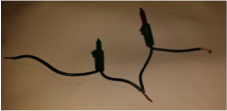
Some power supplies will not turn on unless they are powering something. That is, if nothing is connected to the wires, it won’t start. To solve that problem (and as bonus give a telltale that the power supply is working), strip the ends from two incandescent holiday lights and an orange wire and a black wire.
Solder the two incandescent bulbs together in series.
Solder the pair to the orange black wires. Cover the connections with electrical tape or shrink wrap.
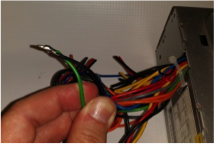
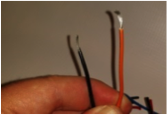
Strip one orange, one red, one yellow, and one black wire.
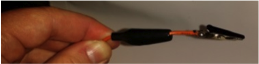
Solder an alligator clip to each wire. Remember to slide the jacket up the wire BEFORE soldering the wire to the clip. Hold the clip and wiggle the jacket over the clip.
If you’d like, you can strip another set of black, orange, red, and yellow wires and solder on alligator clips. Most supplies can give enough current to run two stations. However, the wires are shortish this way, and if one group draws too much current, both groups will be shut off.
Had a workshop teaching Exploratorium Explainers about how different balls worked. This is what's in a baseball. Cork core, two kinds of rubber, 150 yards of wool yarn wound around the core, a string mesh to hold everything together, and a leather cover. Well, that's what's in a MLB-style ball. There are also more boring balls that are made of solid ball of cork and rubber. Click for a full-size view.
Phosphorescent paints are kind of horrible, but glow powders work great. The hard part is getting them to stick. Tammy Cook-Endres suggested Elmer's Glue, and it works great. Washes off with water but dries strong and most importantly, clear. Make a slurry of the pigment and the glue and let to dry. Glow, Inc on Amazon sells a variety of the powders. They seem expensive but they are not so bad as 1/4 ounce is actually a lot phosphorescent powder for our purposes.
Fluorescent paint works better and is cheaper. You can get it from many paint supply stores. Bring a handheld UV lamp if you'd got one to try them out first. These seem pretty good.
Amazon more or less doens't sell laser pointers any more as they had issues with sellers violating FDA rules on power. To get them now, you will have to find your own way. Laserponiter Pro seems like an okay source, but they also sell crazy, dangerous laser pointers. Stick to 5 mW and less to be safe and realize that even then, no one is certifiying that the laser are low power. Keep the spots moving and make sure that the beam never goes into an eye. Watch for mirrored surfaces.
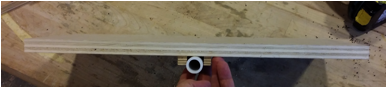
Blue tape arms are filled with sand, hollow arms are on the tableA way to cheat in baseball is to cork a bat. That is, drill out the center of the bat to make it lighter and then fill the bat with cork so that it is less likely to crack when it hits the ball. You might imagine that a player would want as heavy a bat as possible to get the most momentum since momentum is mass times velocity. However, a lighter bat can be accelerated to higher velocity, evening out the lost mass, leaving the momentum close to the same. (See Nathan, 2011)
The key difference is that a lighter bat can turn more easily so that a player can wait just a fraction longer to evaluate the pitch before needing to move the bat. This turns out to be a big edge. With a metal or composite material bat, it is possible to create hollow bats that are much lighter than a wooden bat for the same length. So called "negative bats" have lengths that are larger than the weight of the bat in ounces. Many leagues limit these as to limit the offense.
This device demonstrates that idea. The ends of the arms of the device are filled with sand. They have a torque (a turning force) applied by the falling water bottle. This causes the arms to turn. However, the ends of the arms can be replaced by hollow tubes. When the bottle pulls down on the arms with the hollow tubes, the arms turn much faster.
Materials
about 8 feet 1/2 inch PVC
four 1/2 inch PVC endcaps
cross or four way 1/2 inch PVC connectors
two 1/2 inch PVC slip connectors
6 inches steel rod, preferably powder coated in a diameter close but smaller than the inside diameter of 1/2 inch PVC
PVC ratchetting cutter or hacksaw
30 inches of string
water bottle or other weight
1 cup sand
funnel
tape measure
tall ring stand
two right angle bar connectors (sometimes called cheeseburoughs) for ring stands
blue or black tape, preferably gaffers' tape
glue gun and two sticks of glue
hacksaw (not shown)
Procedure
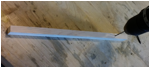
Use the hacksaw to cut the steel bar to about 10 inches long.
Attach the steel bar to the ring stand with a right angle bar connectors.
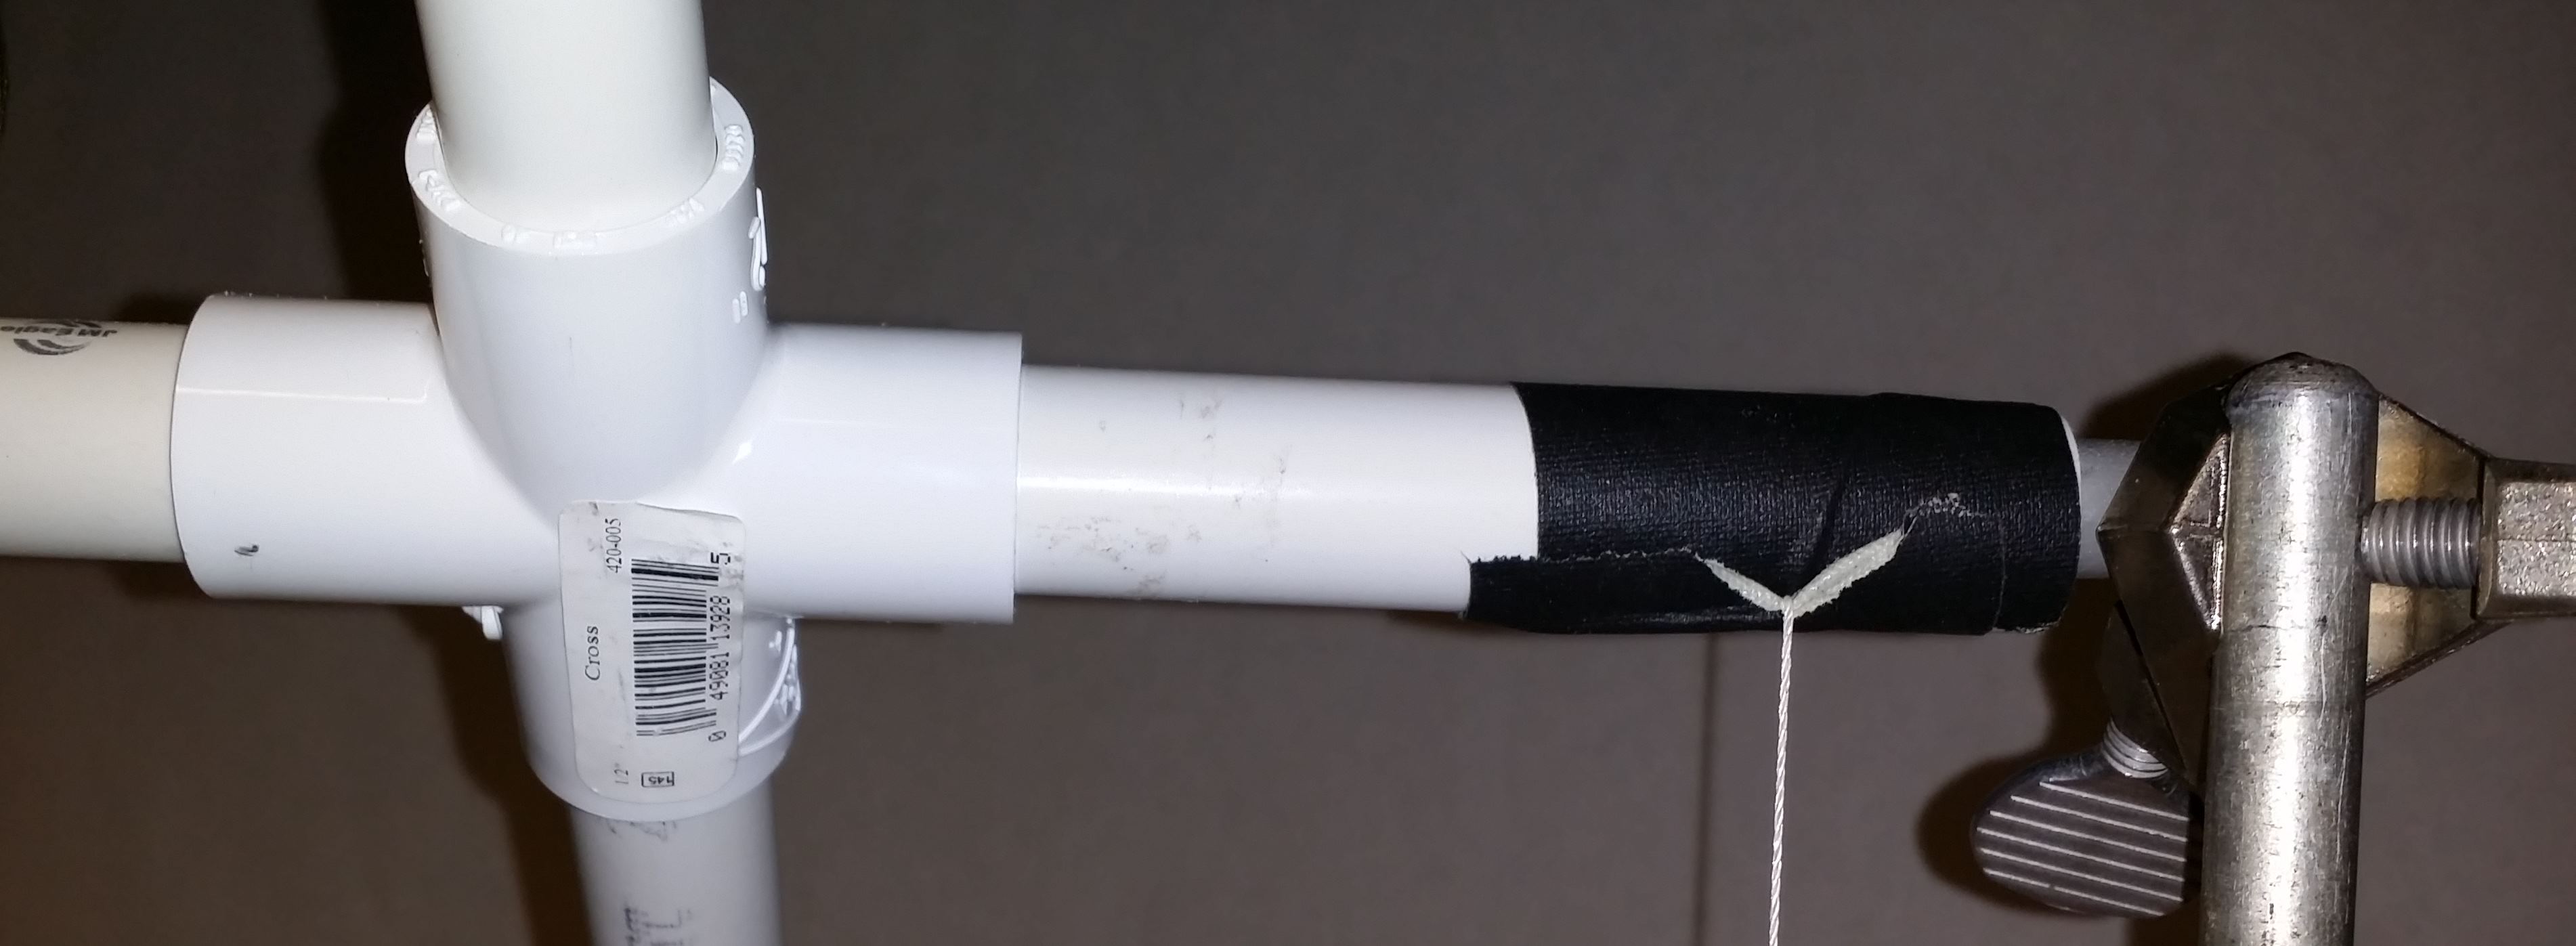
Cut two pieces of PVC so that when they are attached to the cross connector they almost cover the steel rod.
Attach another clamp to the end of the rod, but be sure that the cross connector can turn freely. PVC has a relatively low coefficient of friction on powder coated steel, so even without bearings it should turn easily.
Cut two pieces of PVC about 20 inches long. The exact length is less important than having them be the same length. Attach the slip connectors. Connect to the cross connector.
Cut four shorter pieces of PVC about 10 inches long. Again the exact length is less important than having them be all the same lenght. Attach the endcaps to all the pieces.
Using the funnel, fill two of the shorter pieces with sand until about 1 inch from the top. Try to have both pieces have the same amount of sand in them.
Fill the rest of the space with hot glue so that the sand is trapped inside. Sorry about the focus.
Wait for the glue to cool and set. Mark the pieces with tape.
Attach to the slip connectors.
Fill the bottle with water. Attach string to the mouth of the bottle and tape the string to the PVC. The string should be long enough that the bottle just rests against the ring stand when the string is fully elongated.
Turn the arms to wind up the string. Let fall. Measure the time it takes for the bottle to reach the base of the ring stand. Replace the ends with the other two that don't have the sand. Repeat.
A couple of terrible videos, but they get across how it works.
When a spinning baseball, soccer ball, tennis ball, or table tennis ball move through the air, they feel a force that is caused by the spin. The force, called the Magnus Force or Effect, can be up, down, or side-to-side. You can see more about the effect at Wikipedia. You can watch a hopelessly perky video from SciGirl to get more information.
(Adapted a the demostration called Spin Doctor from Dr. Baseball also known as California State University Chico Professor David Kagan.)
Spinning top
The idea is that after you spin the ball in the PVC trough, the ball moves to the side. In this case, looking down, if you spin the ball clockwise, it will slide to the left. If you spin it counterclockwise, it will slide to the right.
Cut the PVC to 9 inches. A PVC cutter or a hacksaw will work.
Cut the PVC tube the long direction to make a trough. I used a bandsaw for this, but a hacksaw and a vice will work fine.
Put the ball on the chopstick to find where the chopstick fits snugly.
Cut using the hacksaw the chopstick so that it is about 3 1/2 inches long. About 1/2 inch should extend from the bottom and 1 inch from the top.
Take the wooden dowel and chuck it into an electric drill. Tack down the sandpaper. Hold at an angle to make a very shallow point on the chopstick. Much, much shallower than a pencil point. Then round over the top.
Push the peg into the practice golf ball. You will need to fiddle with the exact amount sticking out on each side. The lower the practice golf ball, the better the top will spin, but it will catch on the trough. Higher, the top will be unstable.
Blow on the ball. You don't want to be too close, 10 to 12 inches is good. If you are too close, you will push the top over.
This doesn't really have anything to do with hands on science. Earlier today, I was replying to an email about magnets and I was searching different websites for products. I found two websites, Boreal and Ward's, to be eeriely similar and yet their prices were really different. Ward's was generally a lot less. You can see that here in this screen shot. Weird.
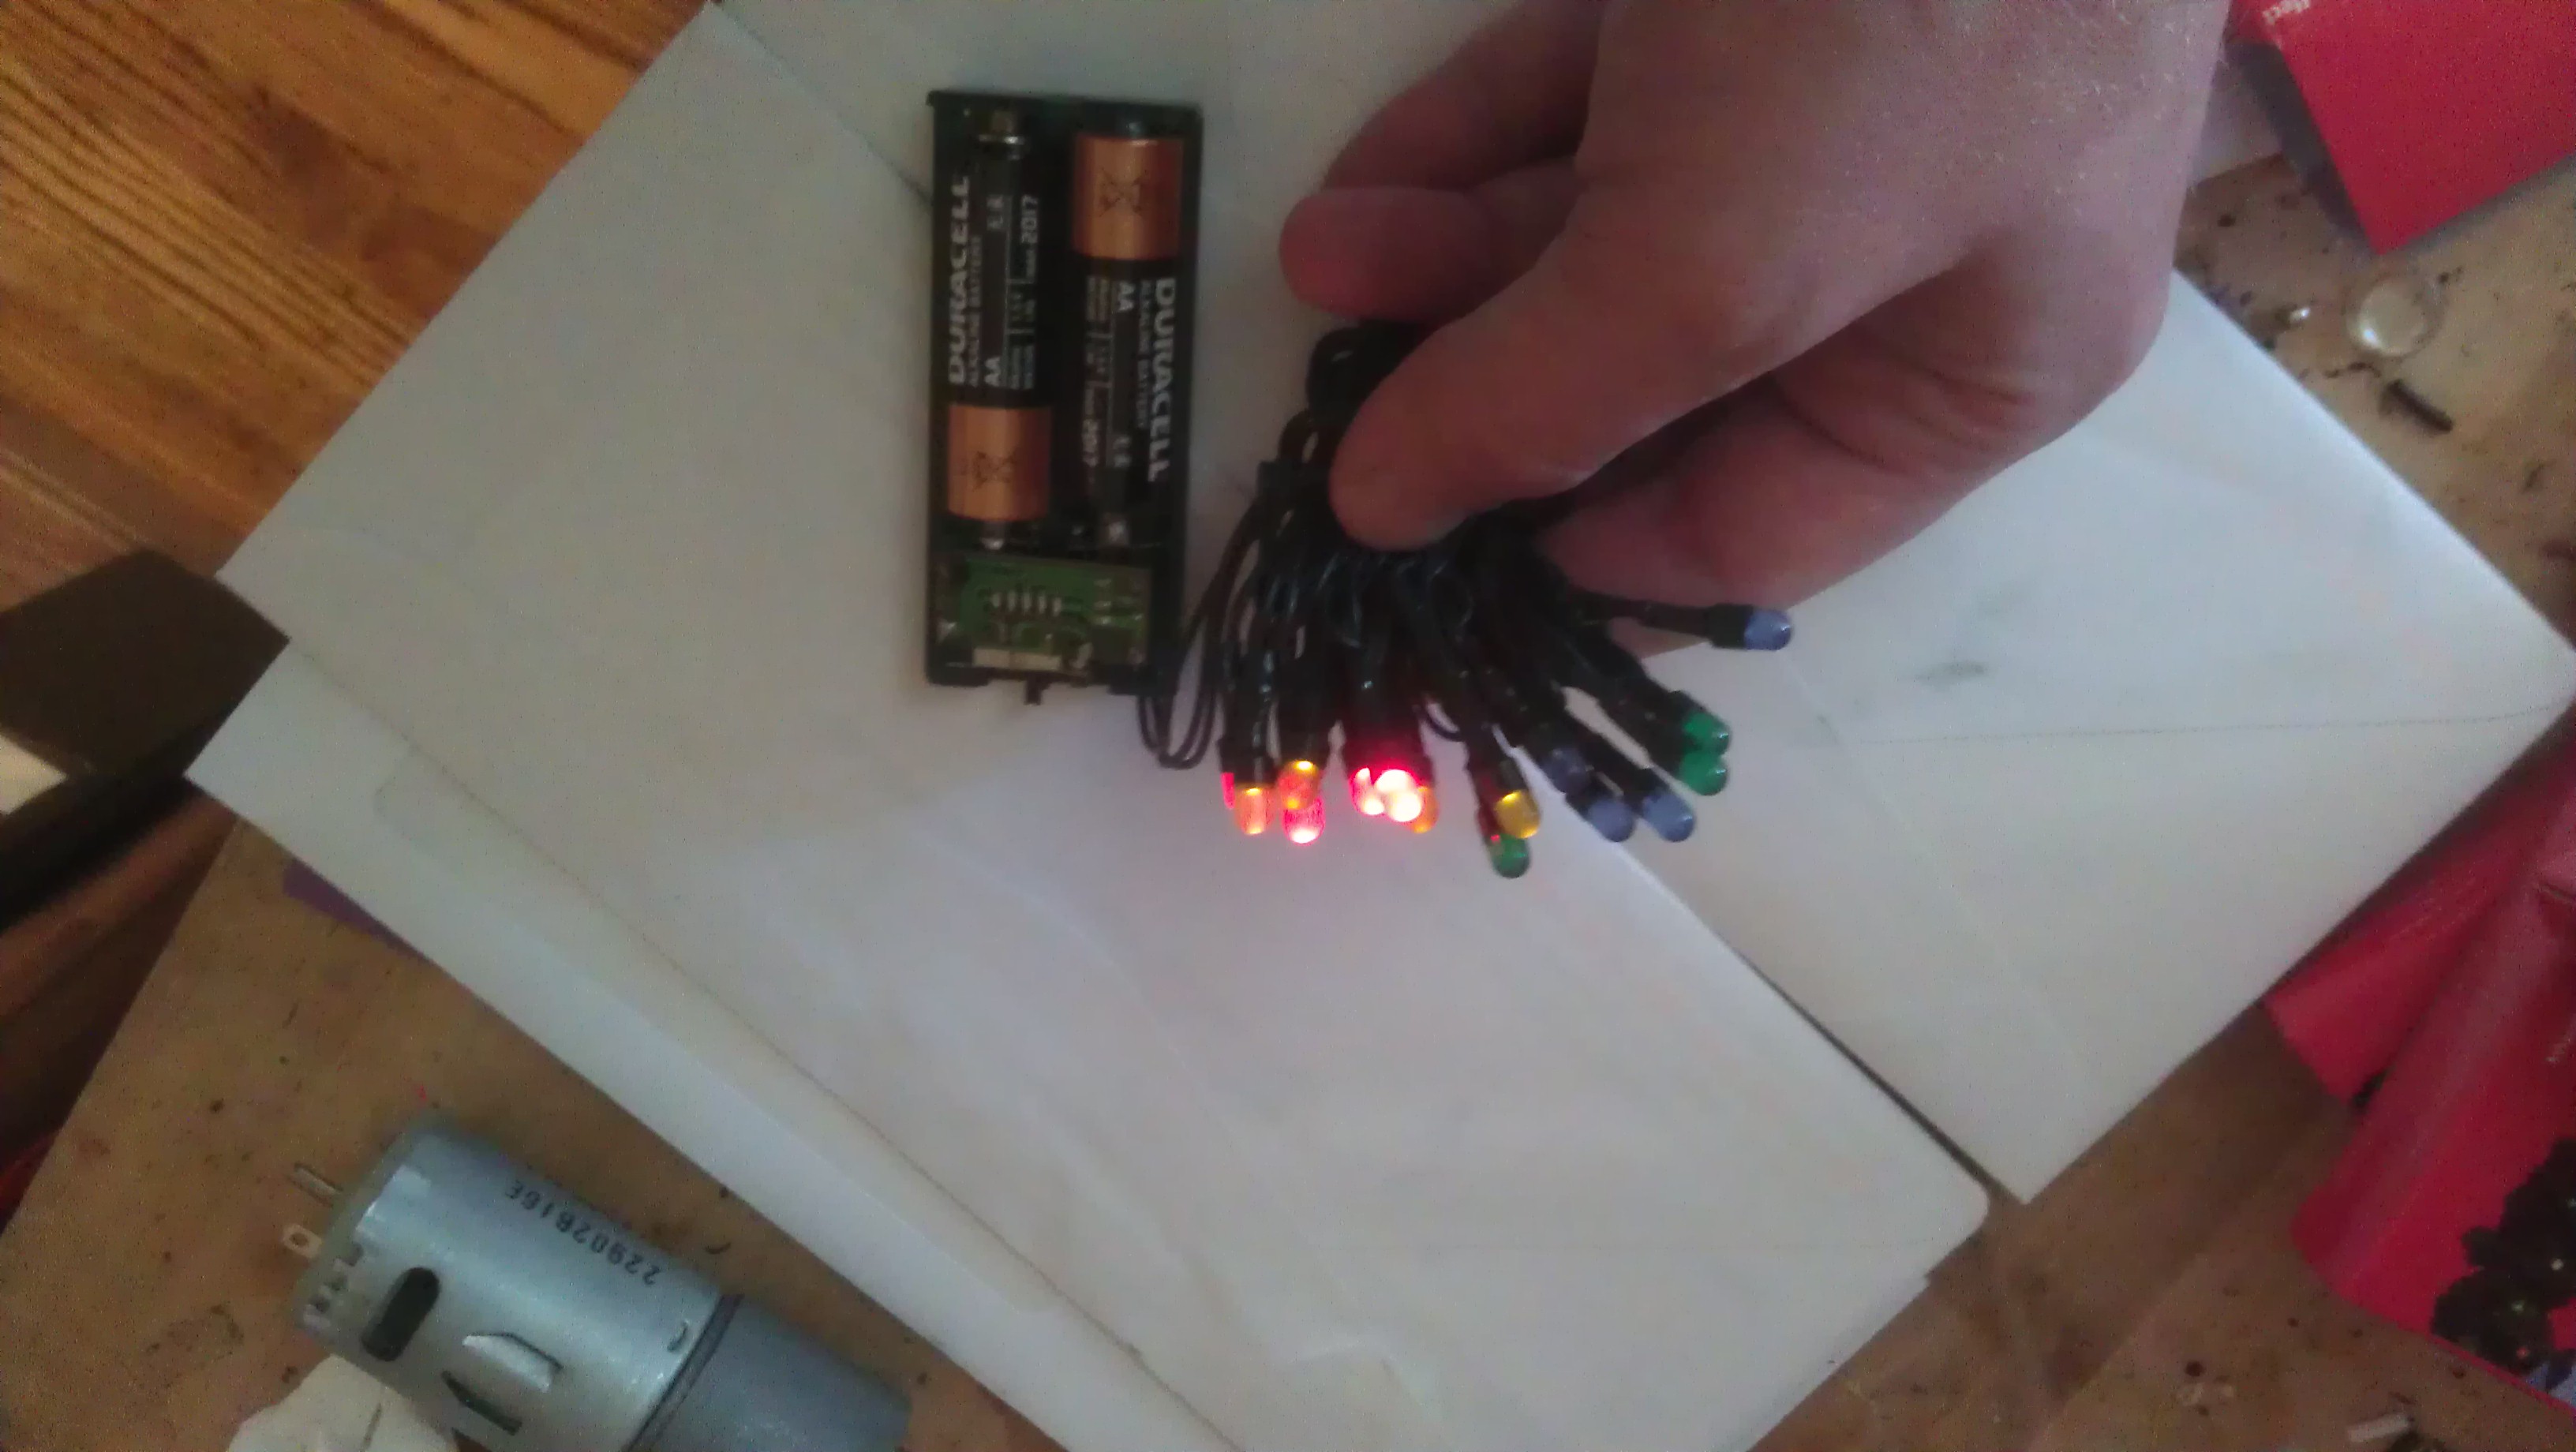
This is a strip of battery-powered LED Christmas Lights which are usually available at Walgreens at Christmas. I got them out to work on a project, turned them on, and was struck by something odd. I used to buy these by the bucket at the low price of three packs for $10 because it was a cheap way to get fairly bright LEDs that were already shrinkwrapped and easy to use. They've changed the lens design to spread out the light more, but they can still be useful. However, that's not what I'm interested in now.
Notice that the red LEDs are really bright, the yellows are dim and the rest are off. This suprised me and made be take a moment to consider what was going on and come up with an explanation.
A clue is that the batteries are mostly used up and aren't able to provide as much voltage as when they were fresh.
LEDs are weird beasts. Like filament light bulbs, if electrons get pushed through them, they start to glow, but unlike filament light bulbs, each color takes a minimum voltage before it will glow. Less than that voltage, you get nothing.
You might wonder why that is. Alhtough the story is really more complicated than this, essentially the LED turns the energy in one of those moving electrons into a bit of light. The energy that an electron has is related to its voltage.
And the energy of light is related to its frequency. The red part of the spectrum has the lowest frequencies and the violet part of the spectrum has the highest frequencies.
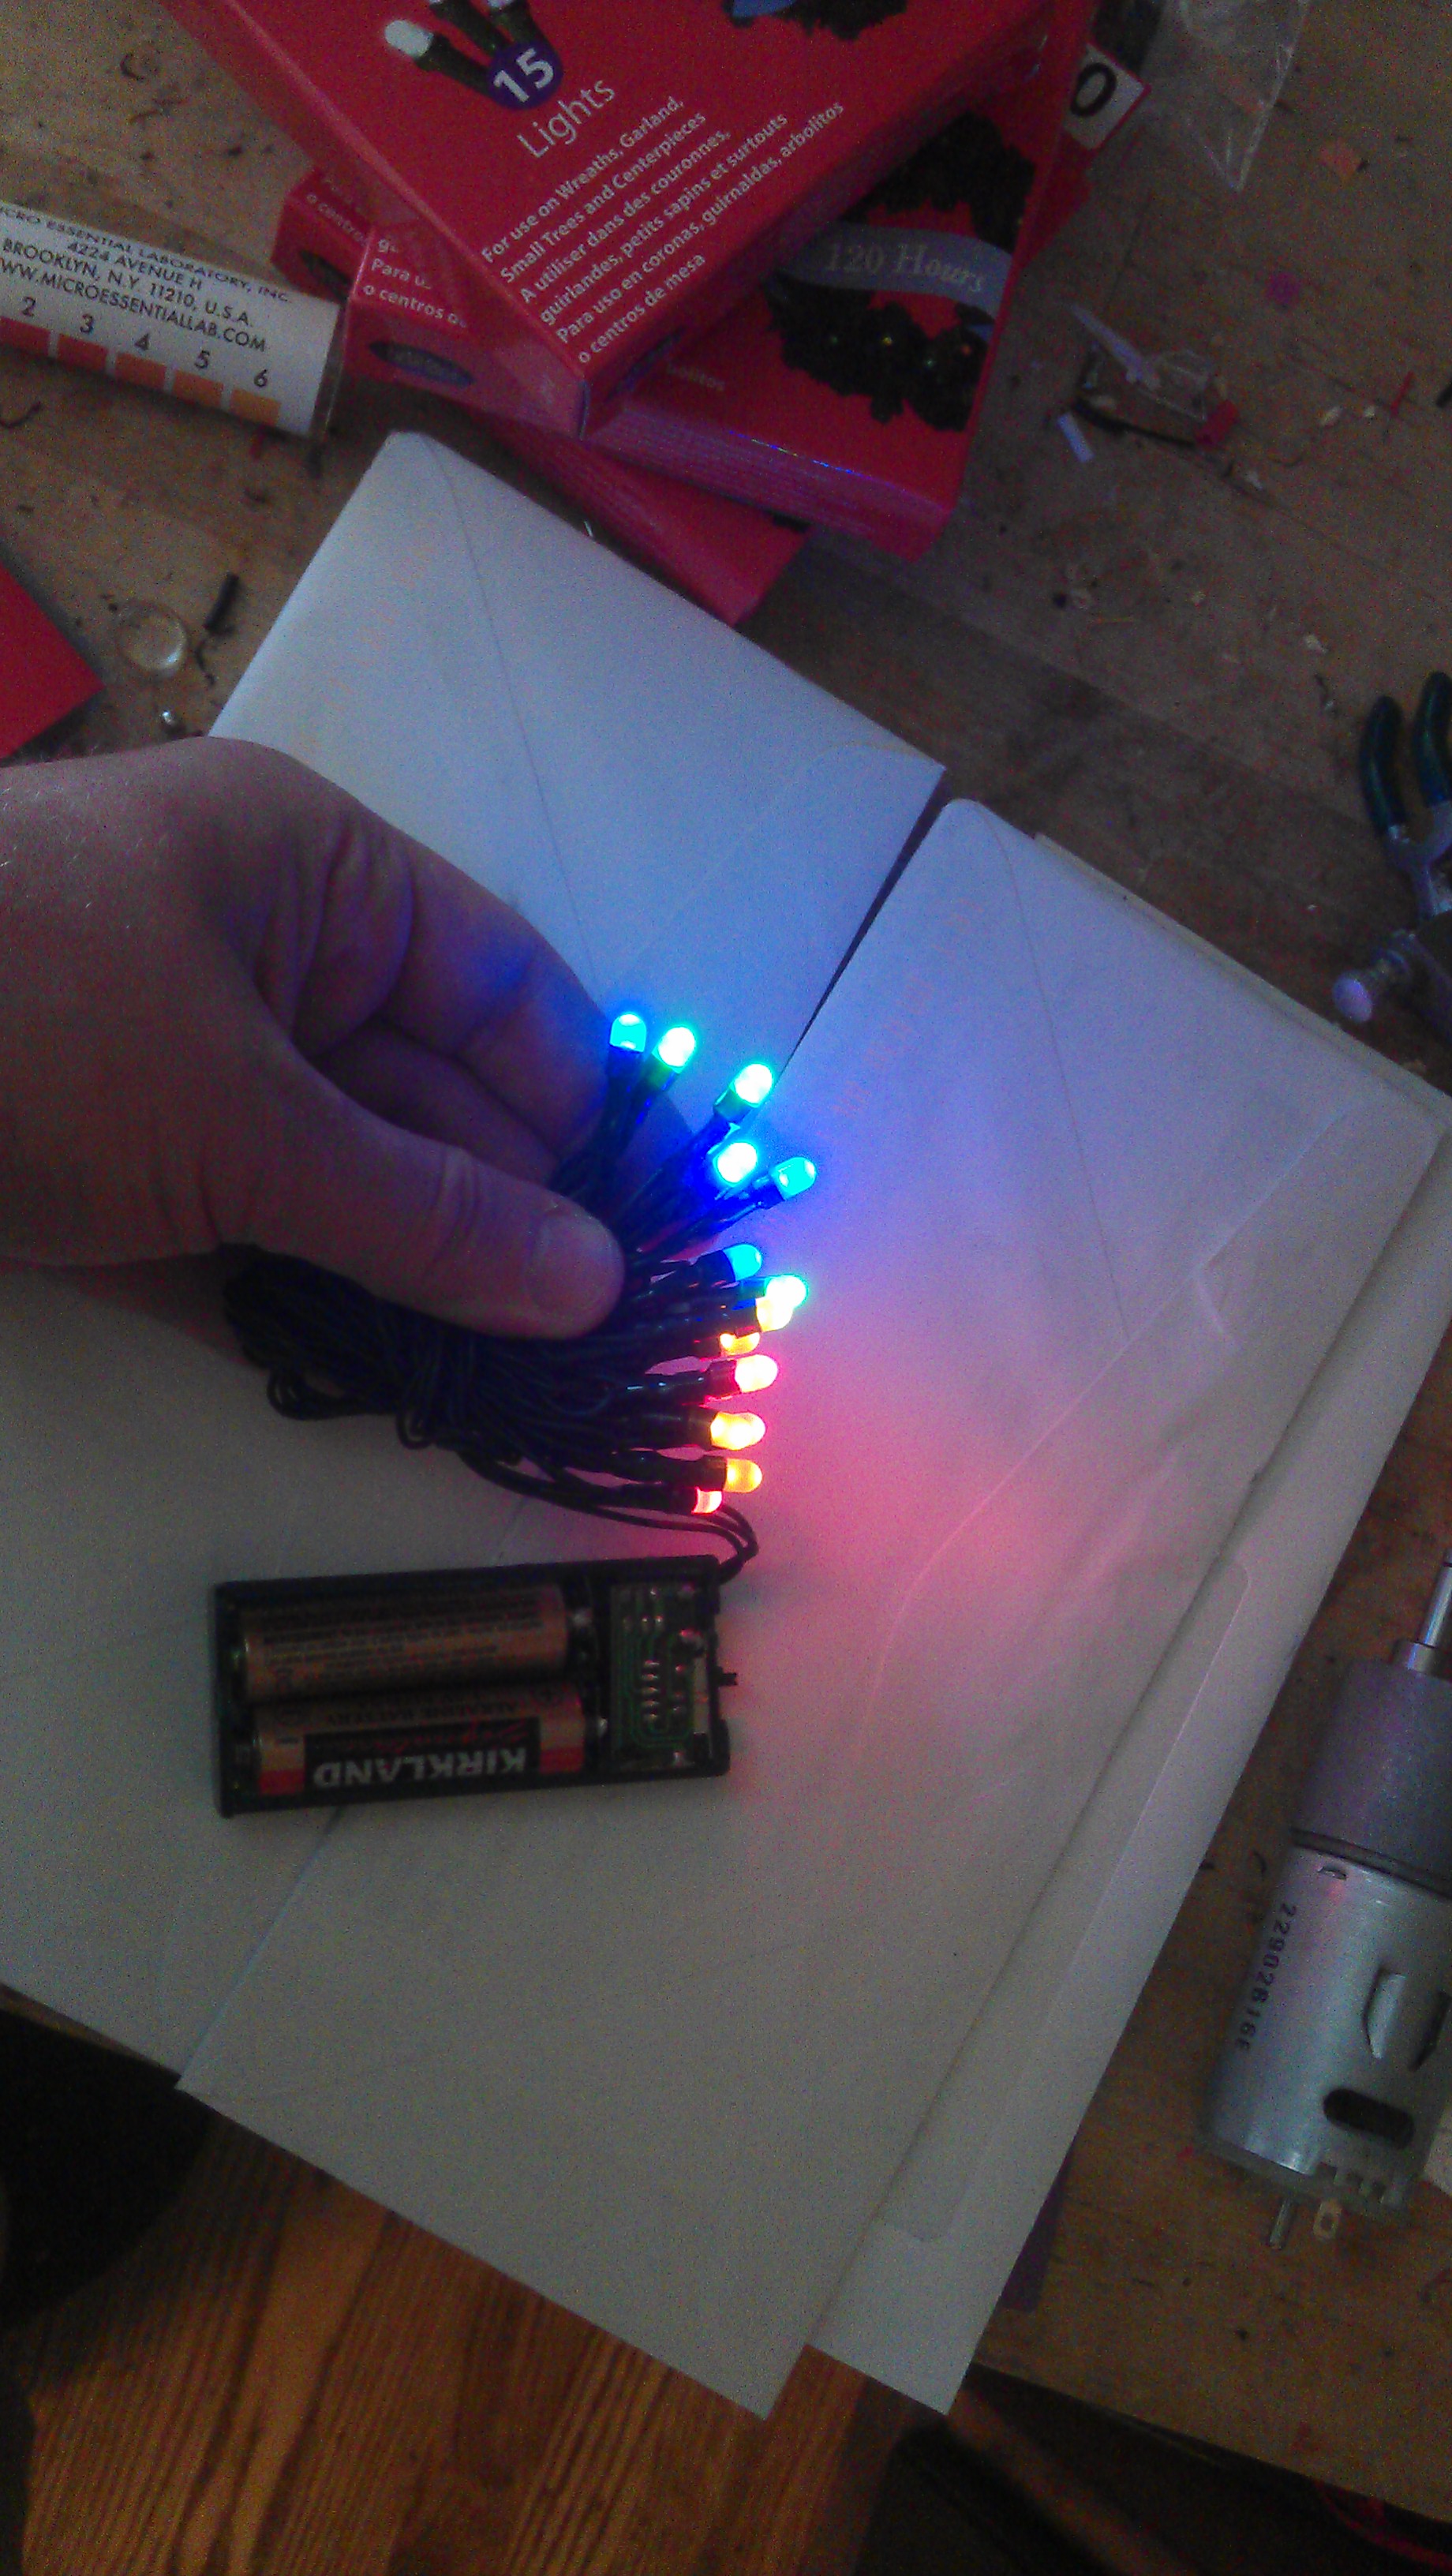
So low voltage electrons have low energy and can only make low energy light which is light with low frequencies which is red light. It takes higher energy electrons to make green and blue light. Since there aren't any high energy electrons, the green and blue LEDs can't make any light.
Perhaps you could put two electrons together to make blue light? That doesn't work in most cases, though. Quantum means more or less "the smallest possible amount."
With fresh batteries, everything started to work as you'd expect.
Playing with a spinning wheel is fun, but understanding where precession comes from is hard. Vertassium gives it a try, but it is still pretty tough going.
There are a bunch of mathematical ways to think about it using cross products and the like, but Lewis Carroll Epstein gives a good mechanical way of thinking about it in Thinking Physics, and I've expanded it a bit here.
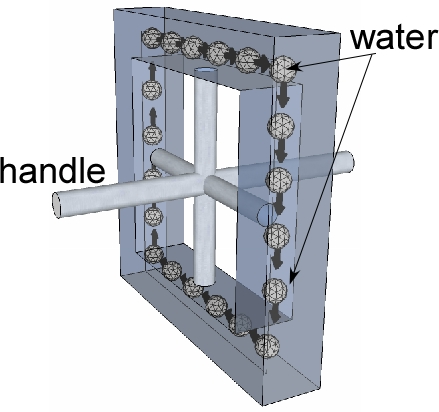
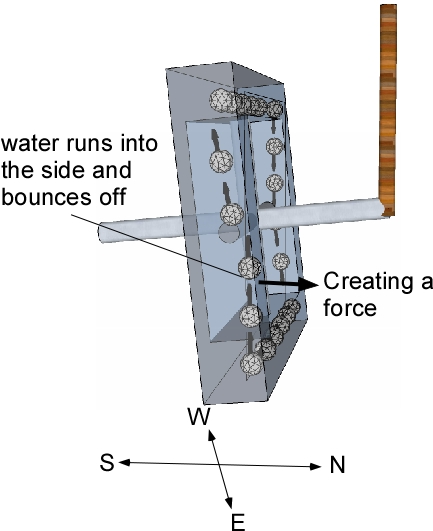
Epstein's ideas is that instead of using a bicycle wheel, let's imagine a much simplified gyroscope. It is a square tube of water, and instead of a wheel turning, the water is flowing in the tube. I've drawn a picture in SketchUp to show that. Email me if you'd like the 3D file.
Simplified version of a gyroscope
We tie a rope to the left side and let gravity do its thing. The left side will stay in place but the right side will fall.
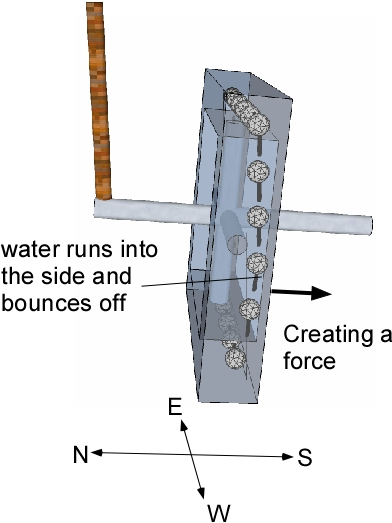
The water running along the horizontal sides (top and bottom sides or east-west) are largely unchanged, but the water running vertically runs into the wall and bounces off. That creates a force. To be specific, in the west leg, the water runs into the south side and bounces off to the north. That creates a force on the west leg to the south.
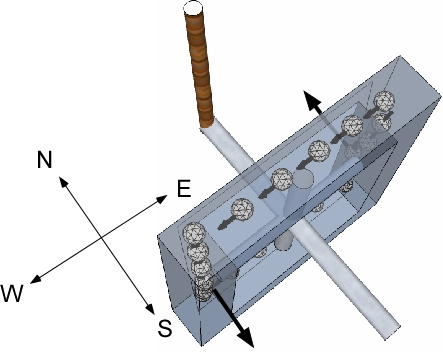
from the other side
The same thing happens on the other side but the water bounces to the south so the force is to the north.
Maybe it is easier to see it from above. from above
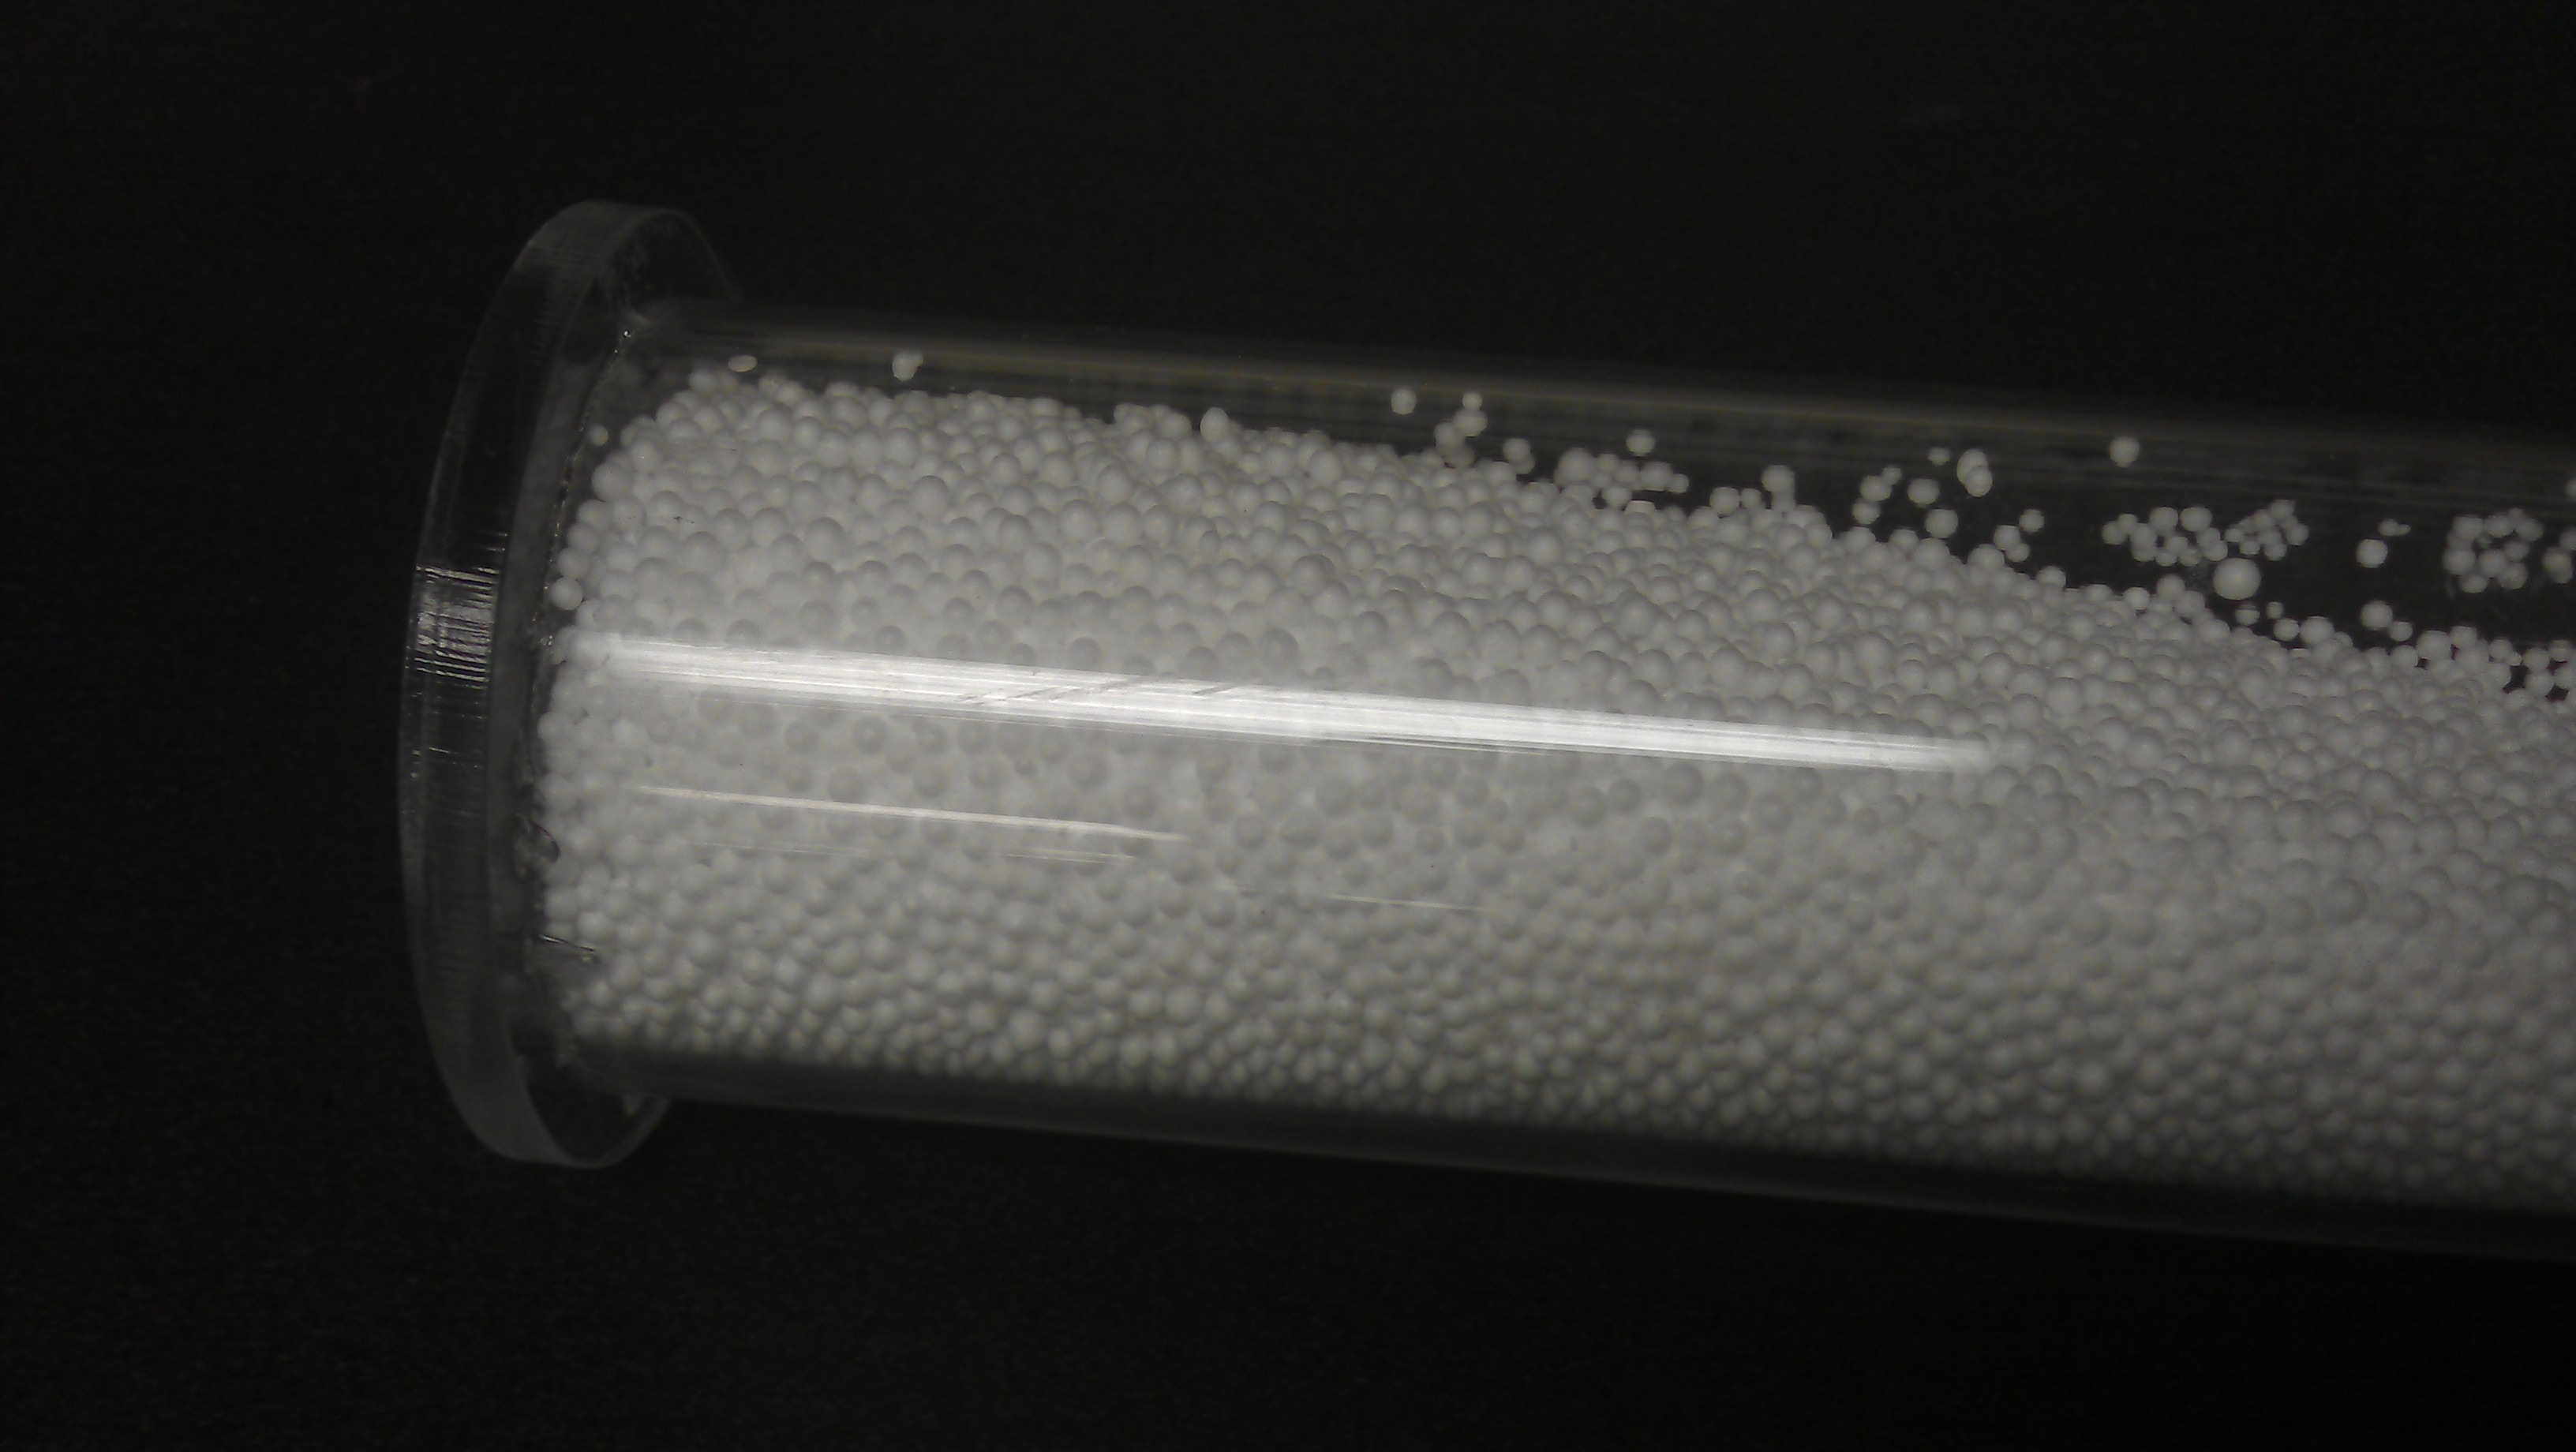
The acrylic tube is 72 inches long x 2 1/2 inch (outside diameter). I bought mine at Tap Plastic, but you can get it online. The beads are expanded polystyrene (one brand is Styrofoam) for bean bag chairs. The minimum order from Tap Plastic was three cubic feet. You need a lot less, so if you live in the Bay Area, I'm happy to give you some.
I used plastic glue to finish the end away from the speaker.
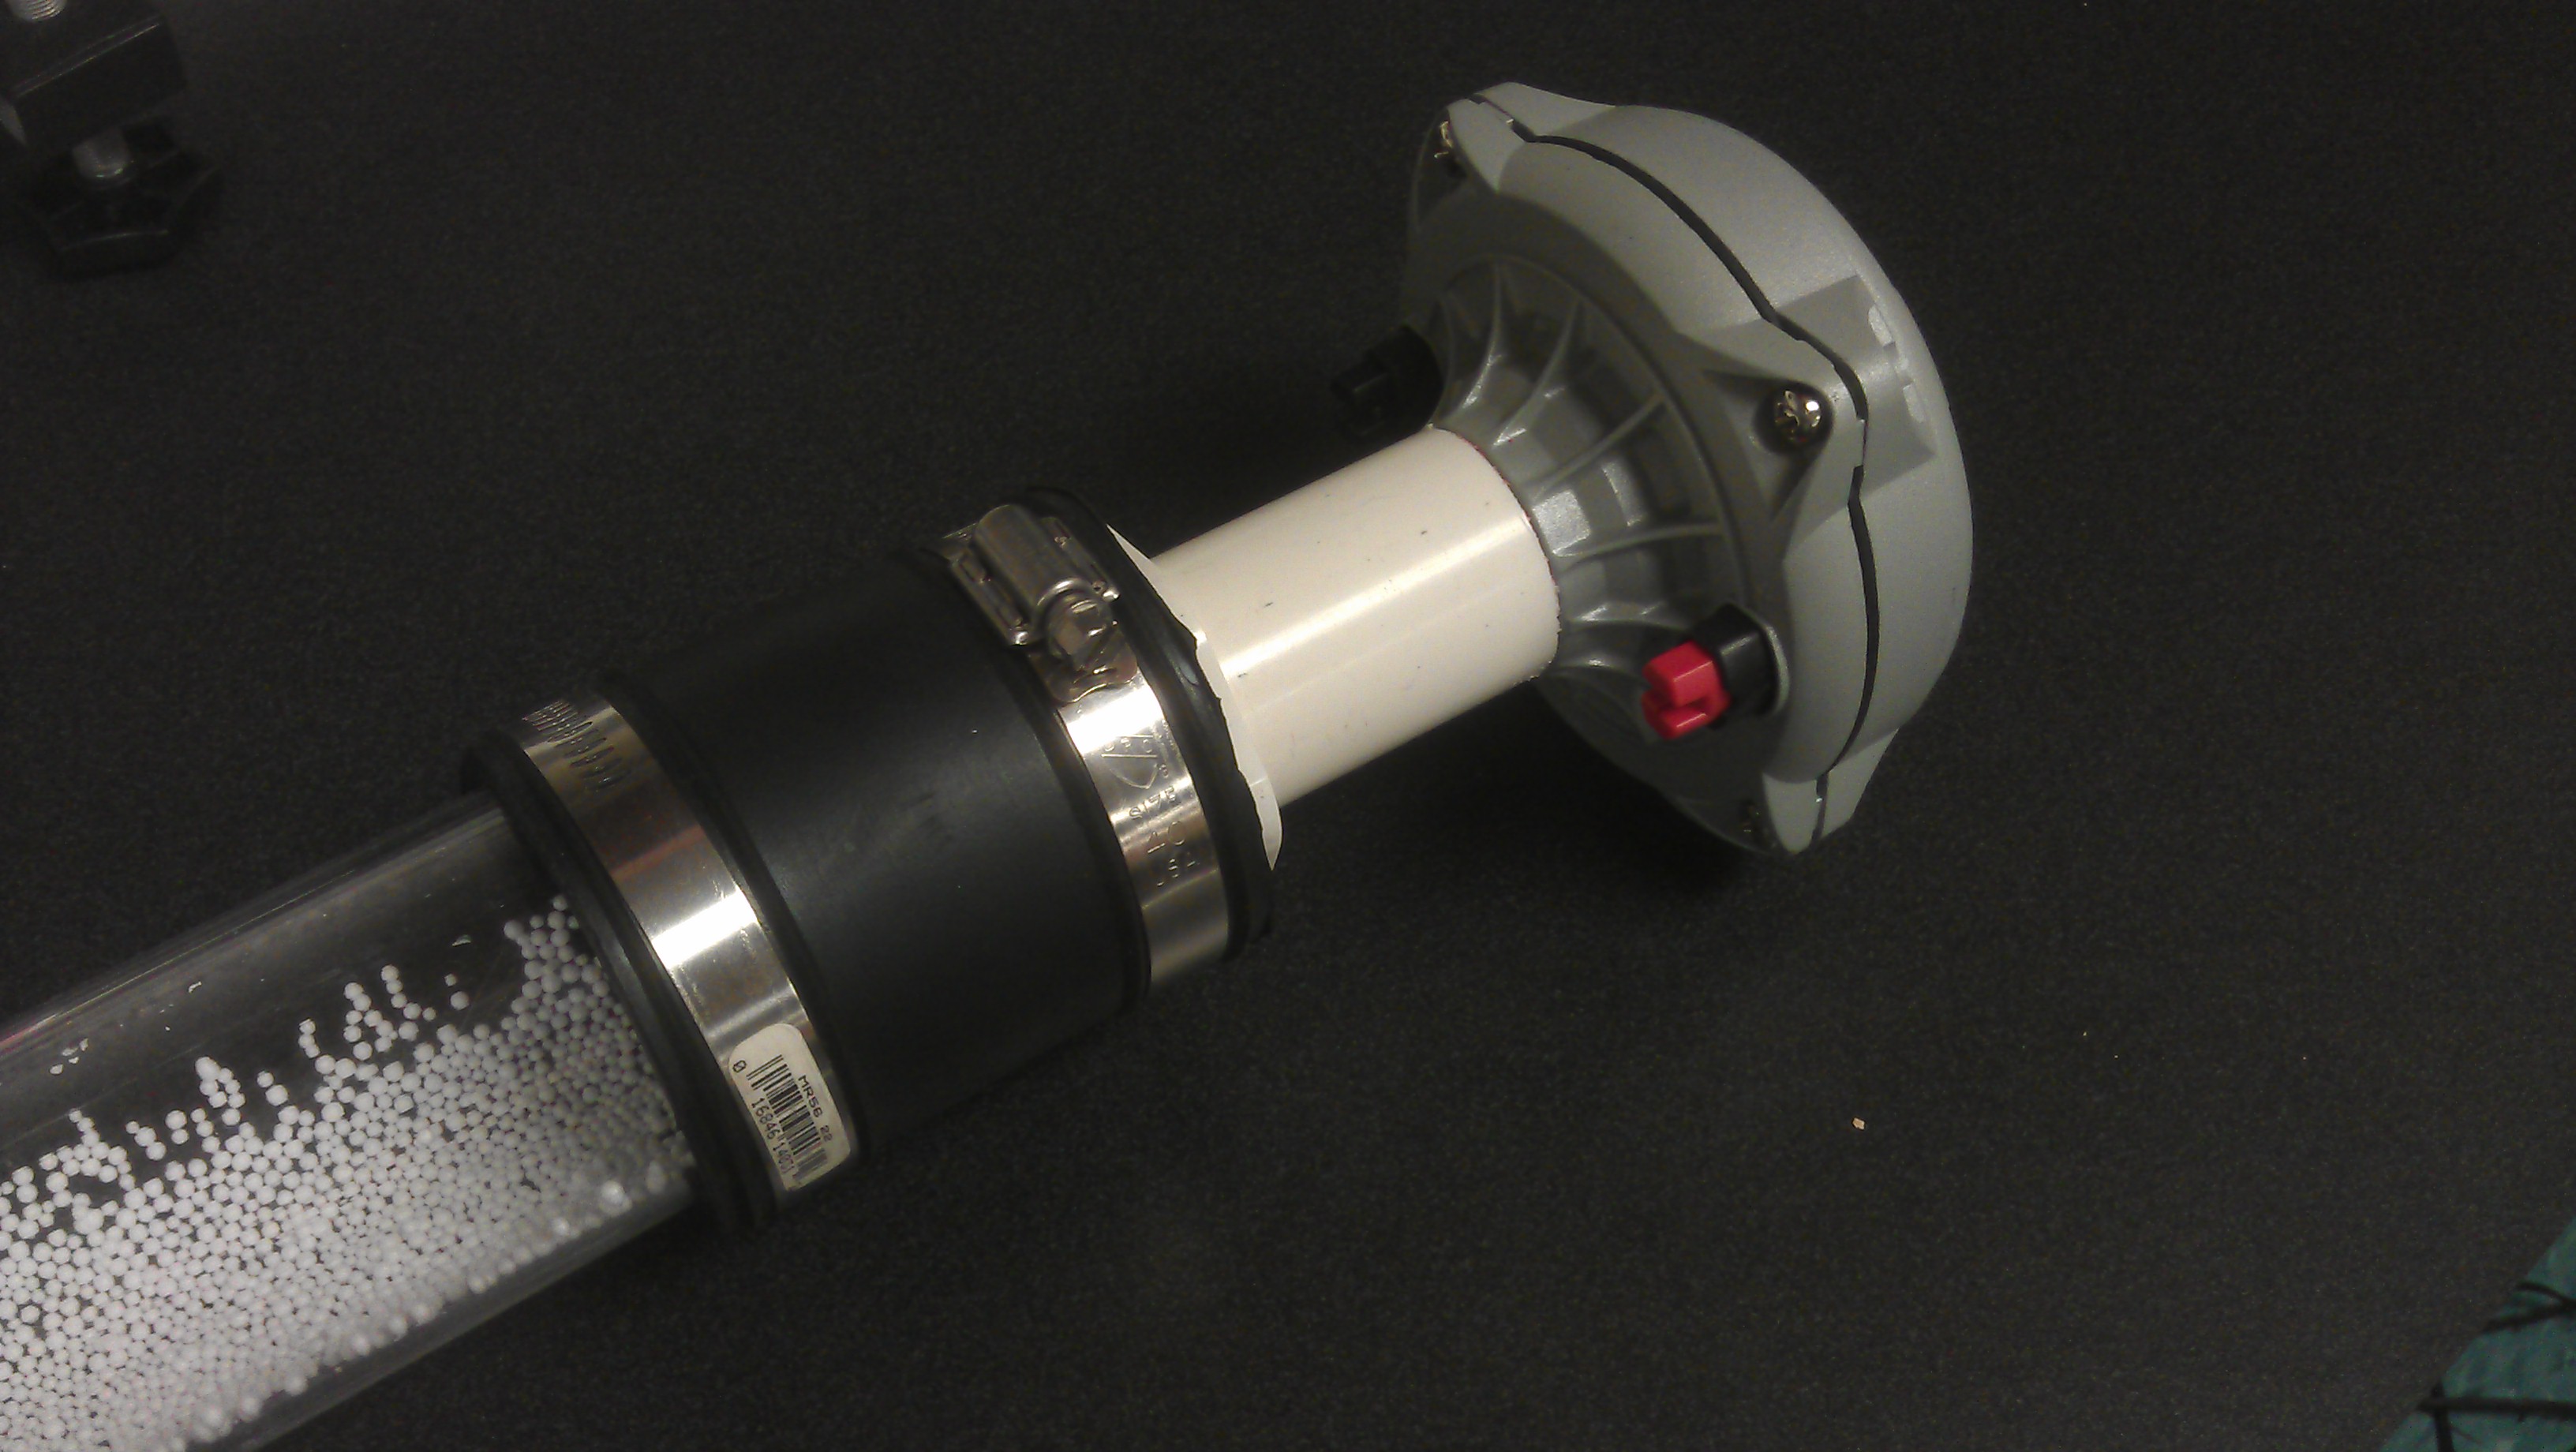
Connecting the speaker to the tube in an airtight way was a challenge. The threads on the horn driver are different than those on PVC. Grr. Instead I made my own piece. I cut a short length of 1 1/4 inch PVC. I melted some InstaMorph in the microwave and put it inside the PVC. InstaMorph sticks to PVC and before it hardened, I screwed the driver on. Presto! A piece of PVC with the right threads. You don't have to be this elaborate though, it will still work with the PVC pipe just pushed into the threads of the driver.
The other side of the pipe is connected to a PVC 2" x 1.25" reducer bushing. Then I used a rubber pipe coupling to connect between the arcylic tubing to the PVC.
Driver plus PVC connector
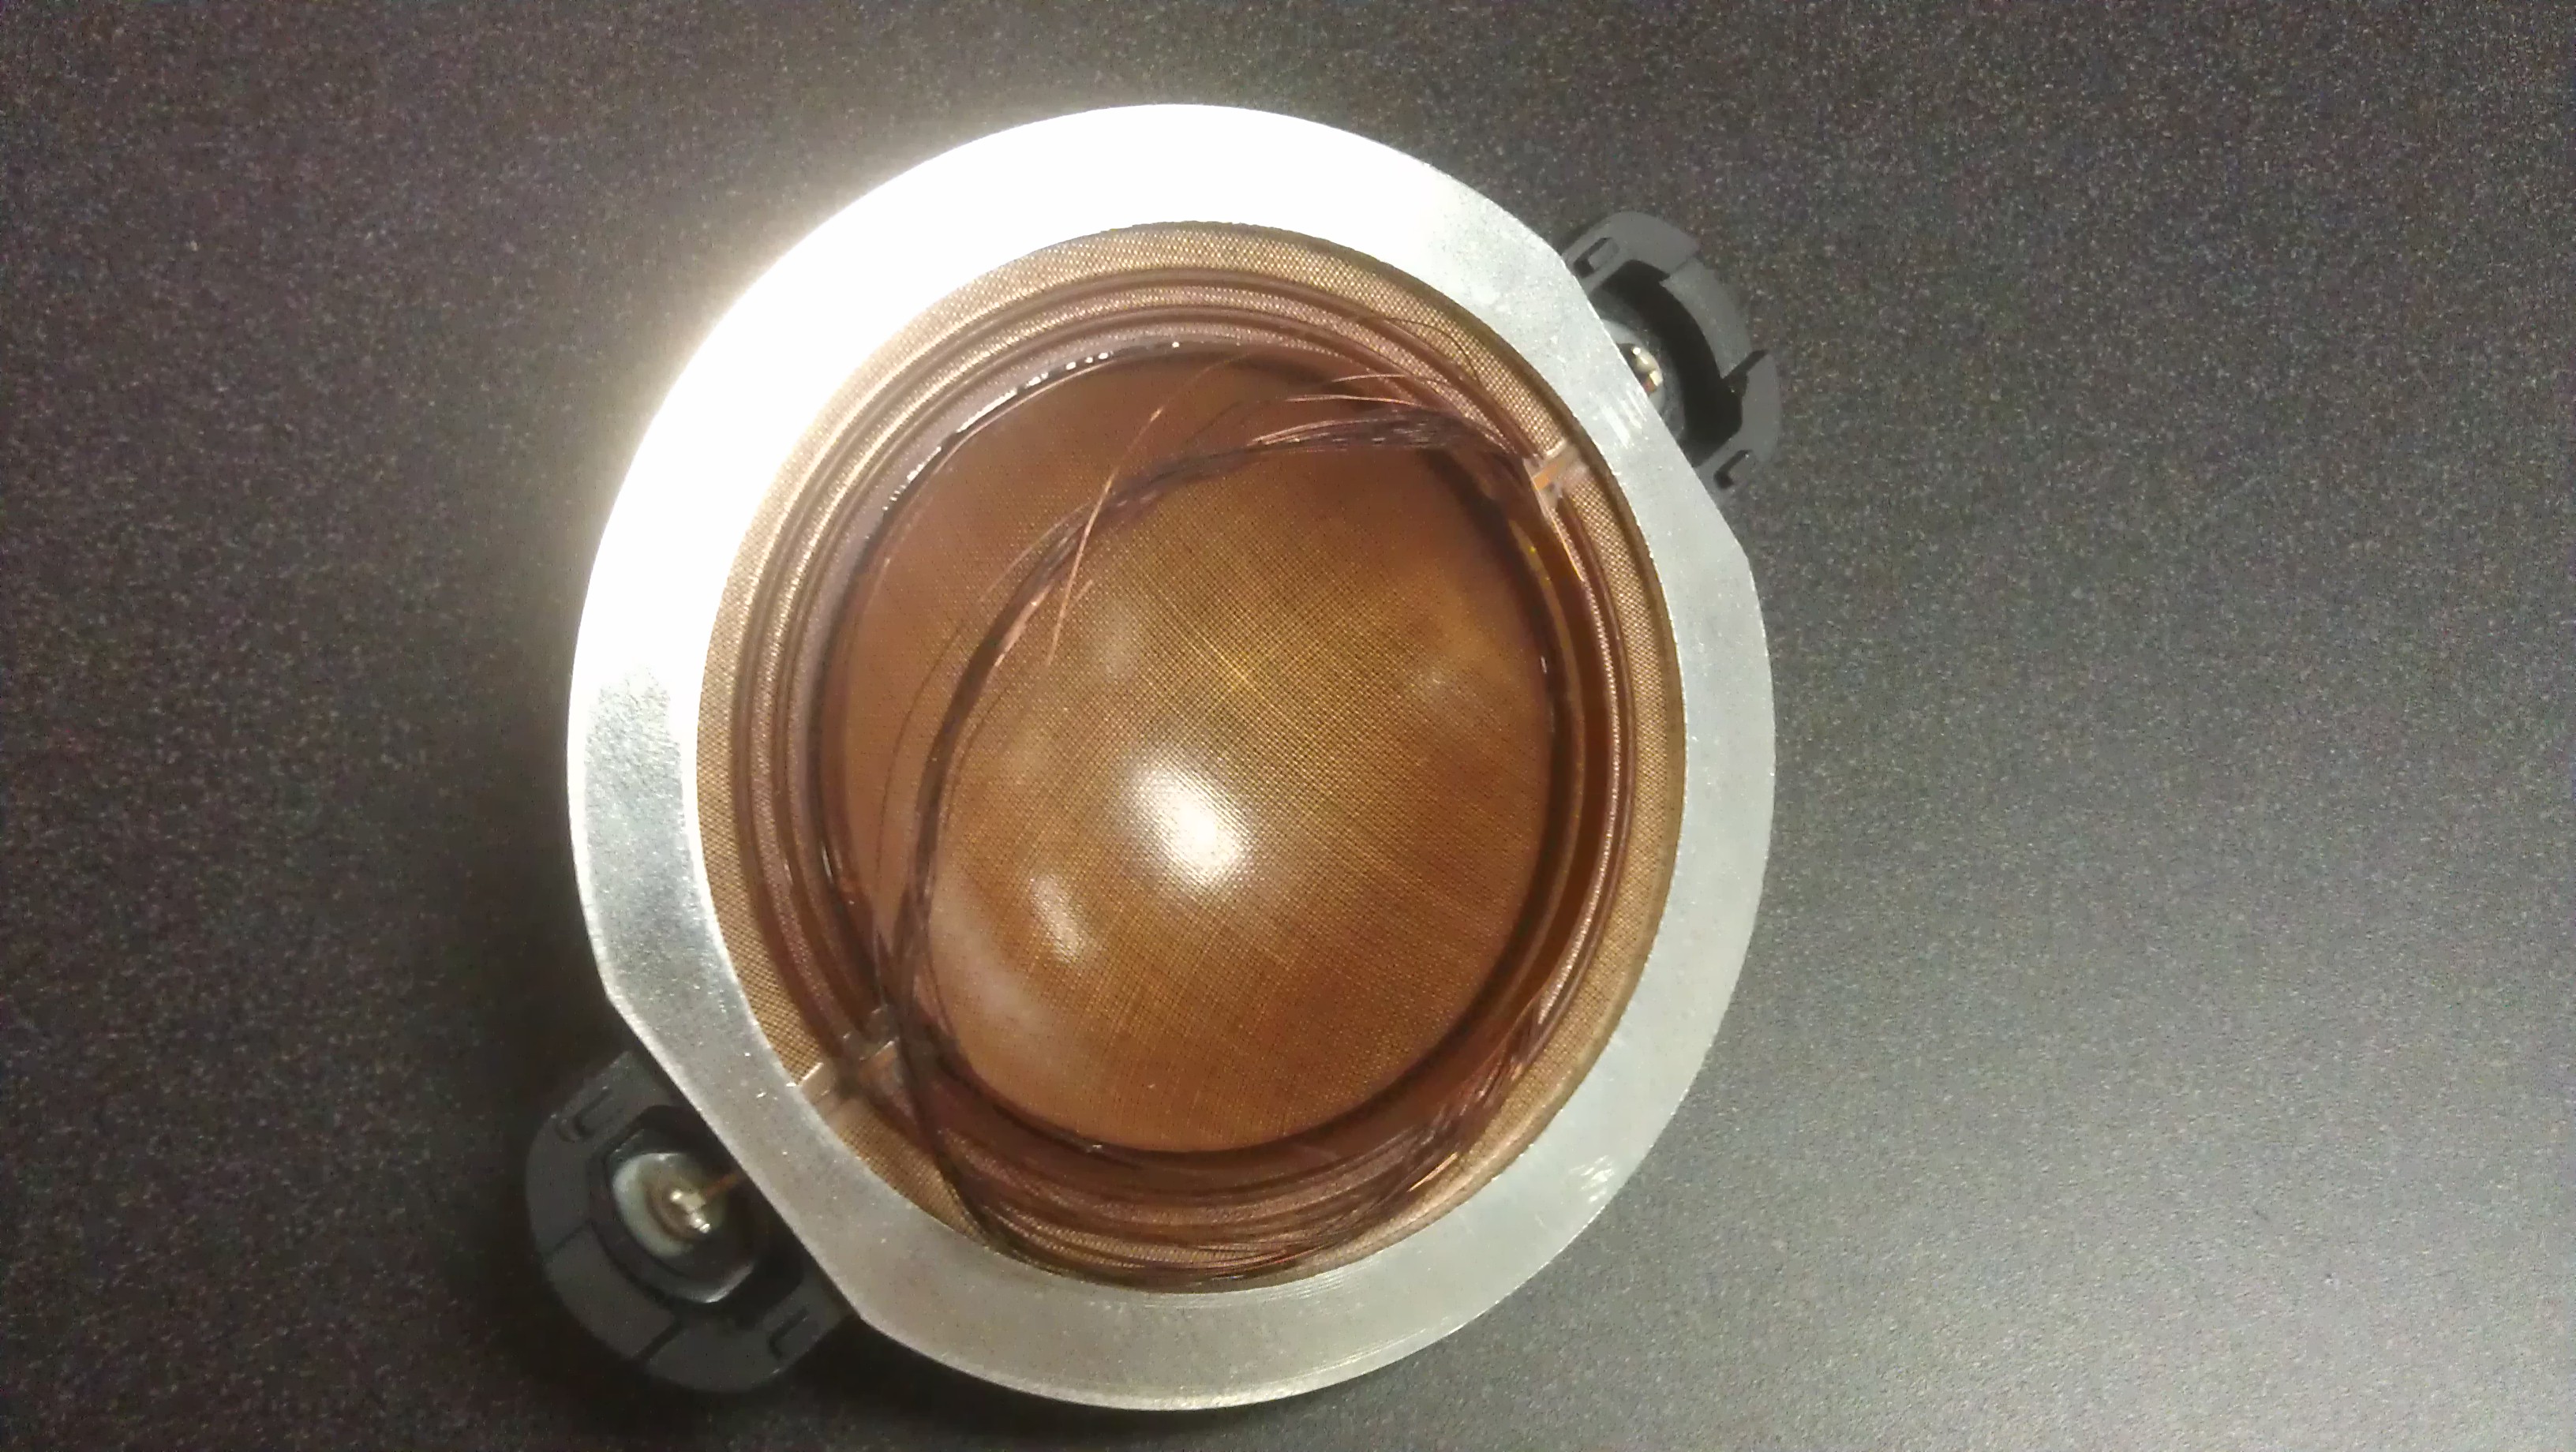
You need a lot of amplitude (air motion) to move the beads. I use a horn driver since they are small and can fit into the tube. The horn driver is a Selenium D 250-X that I got from Parts Express for about $40. It is rated at 250 W at 1000 Hz and higher and 150 W at 500 Hz to 1000 Hz.
That last bit is important. As the frequency goes down the amount of power that the driver can handle goes down. Too much power will melt the wires in the driver, and it will stop working.
Burned out. Smells bad too. A nice thing about the Selenium drivers is that Parts Express sells replacements.
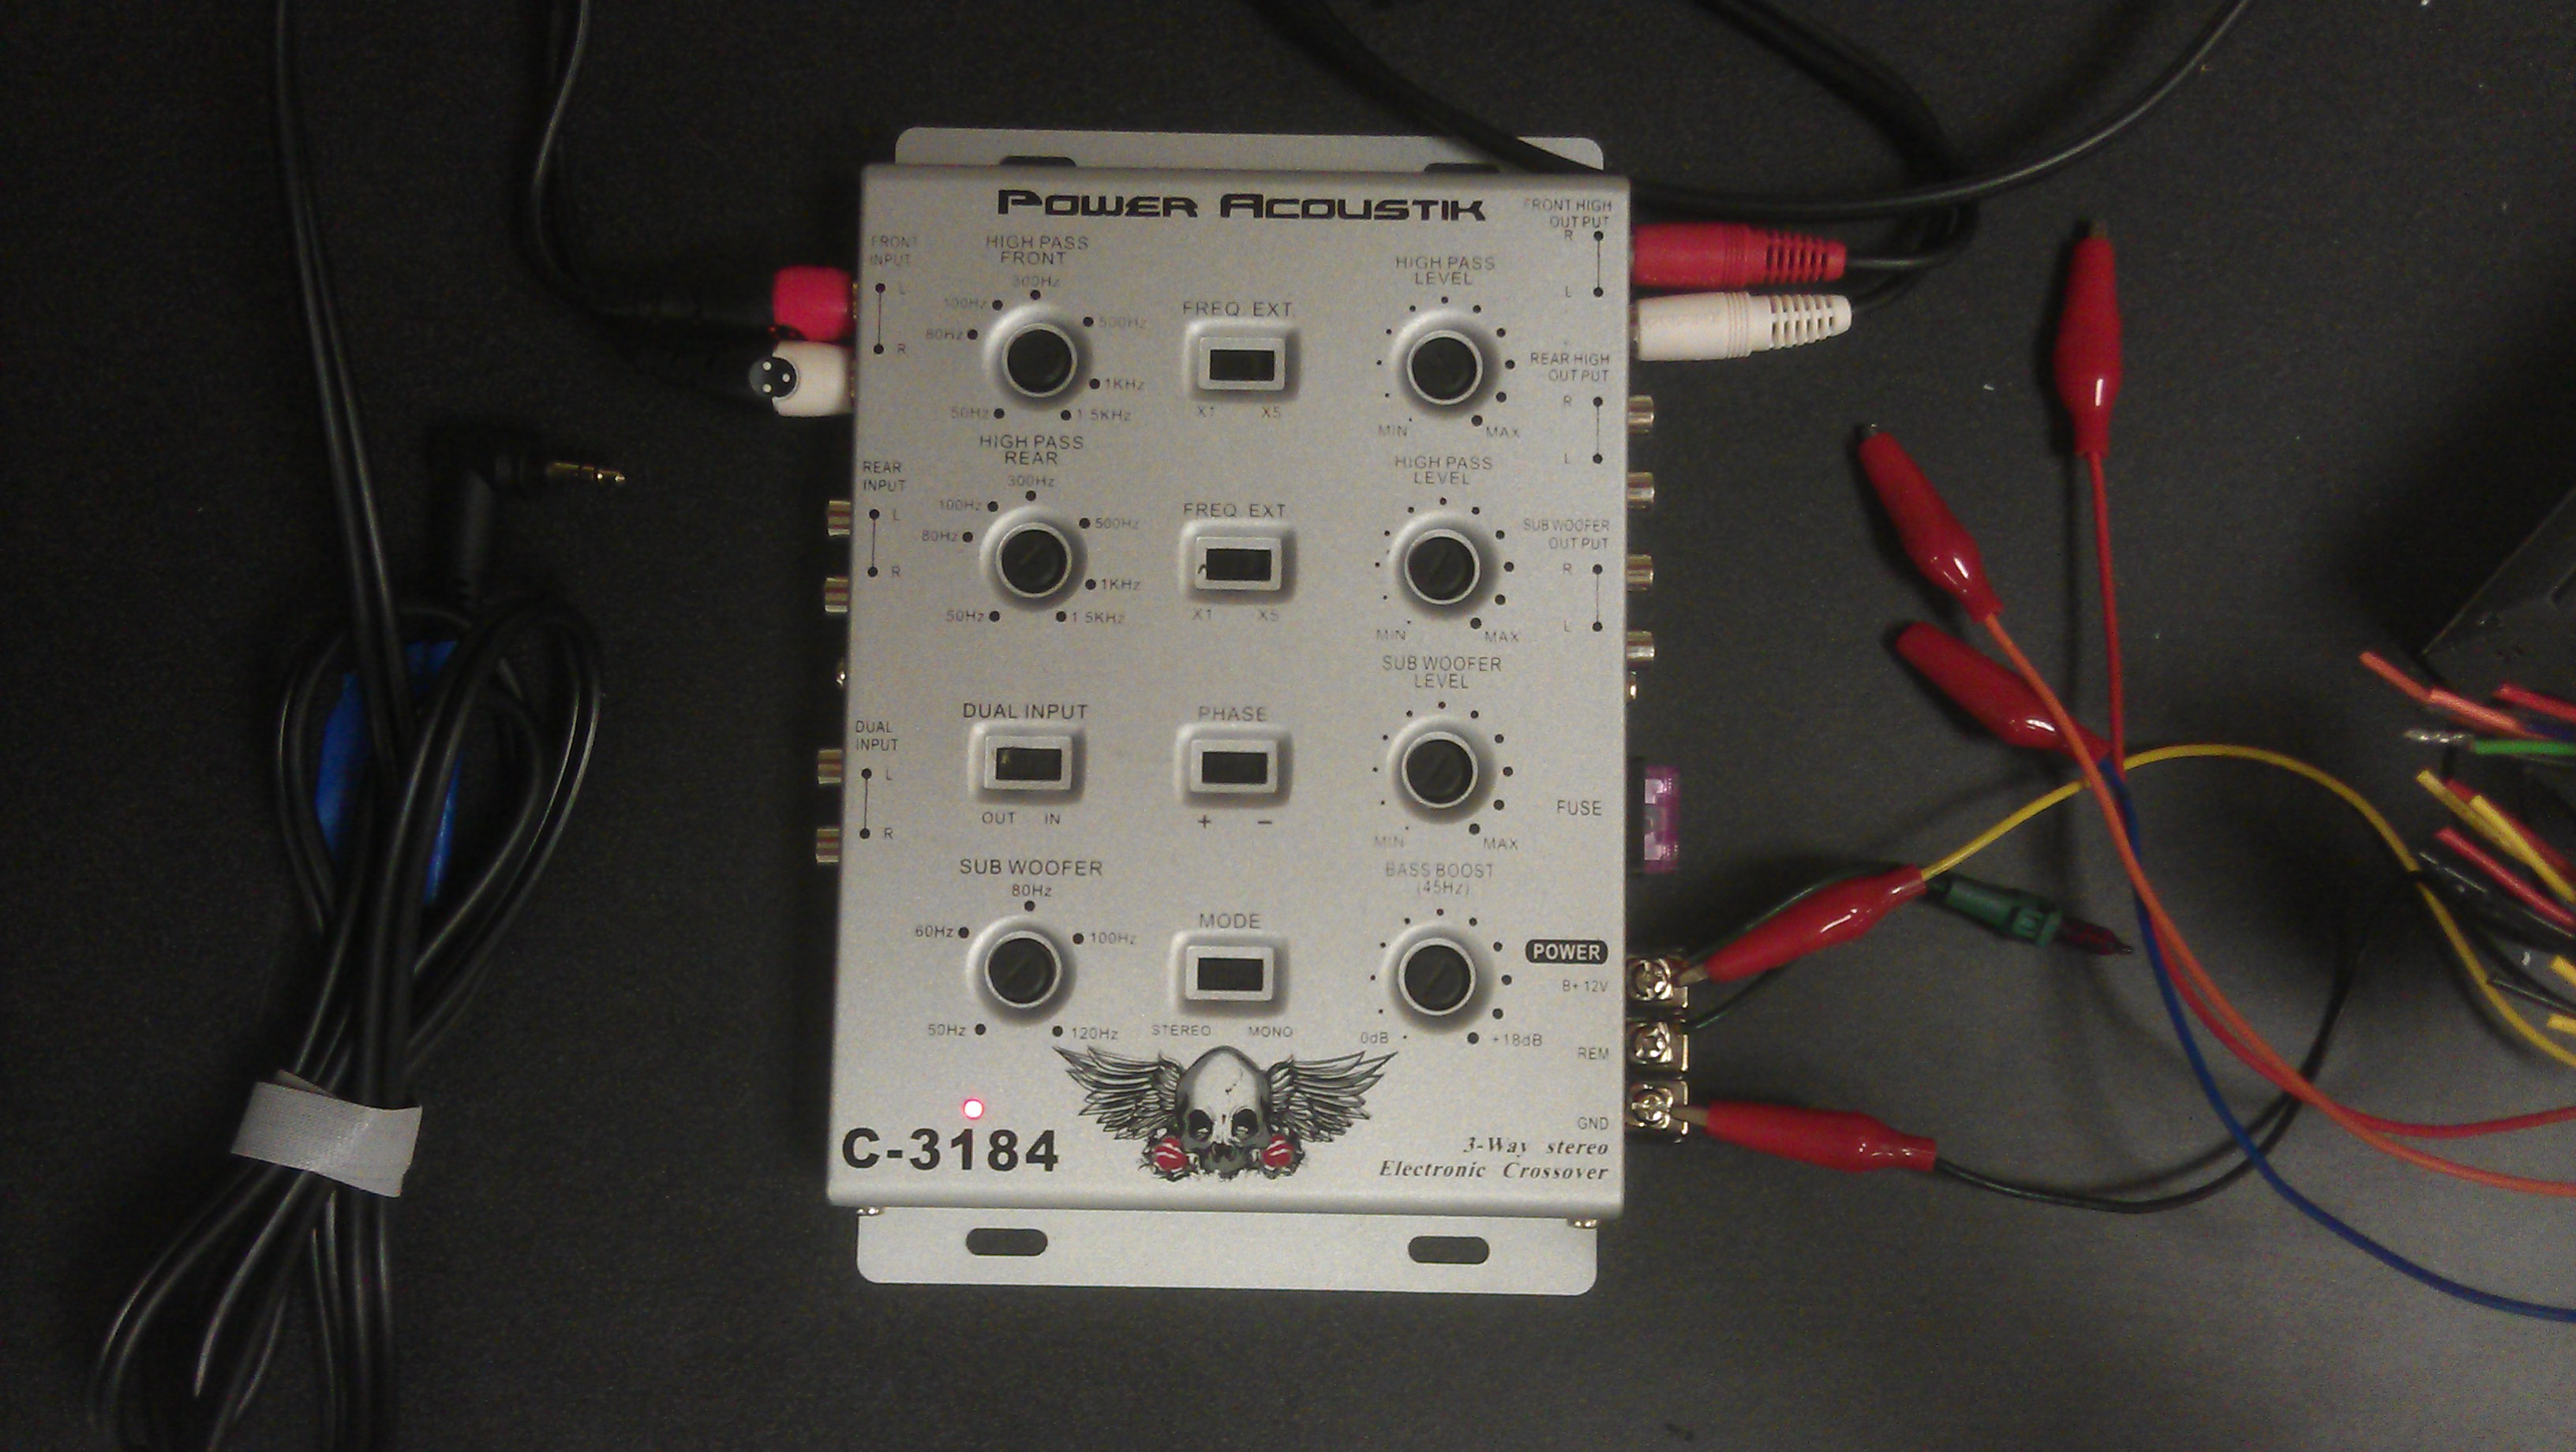
The key then is to get rid of any low freqencies from the signal, otherwise you'll melt the driver. For this, I used an electronic crossover which allows some frequencies through and blocks others. I used the Power Acoustik C3184 which has a variable crossover, and I set it to reject frequencies below 600 Hz. Makes the songs sound tinny but allows me to pump up the volume.
Variable crossover
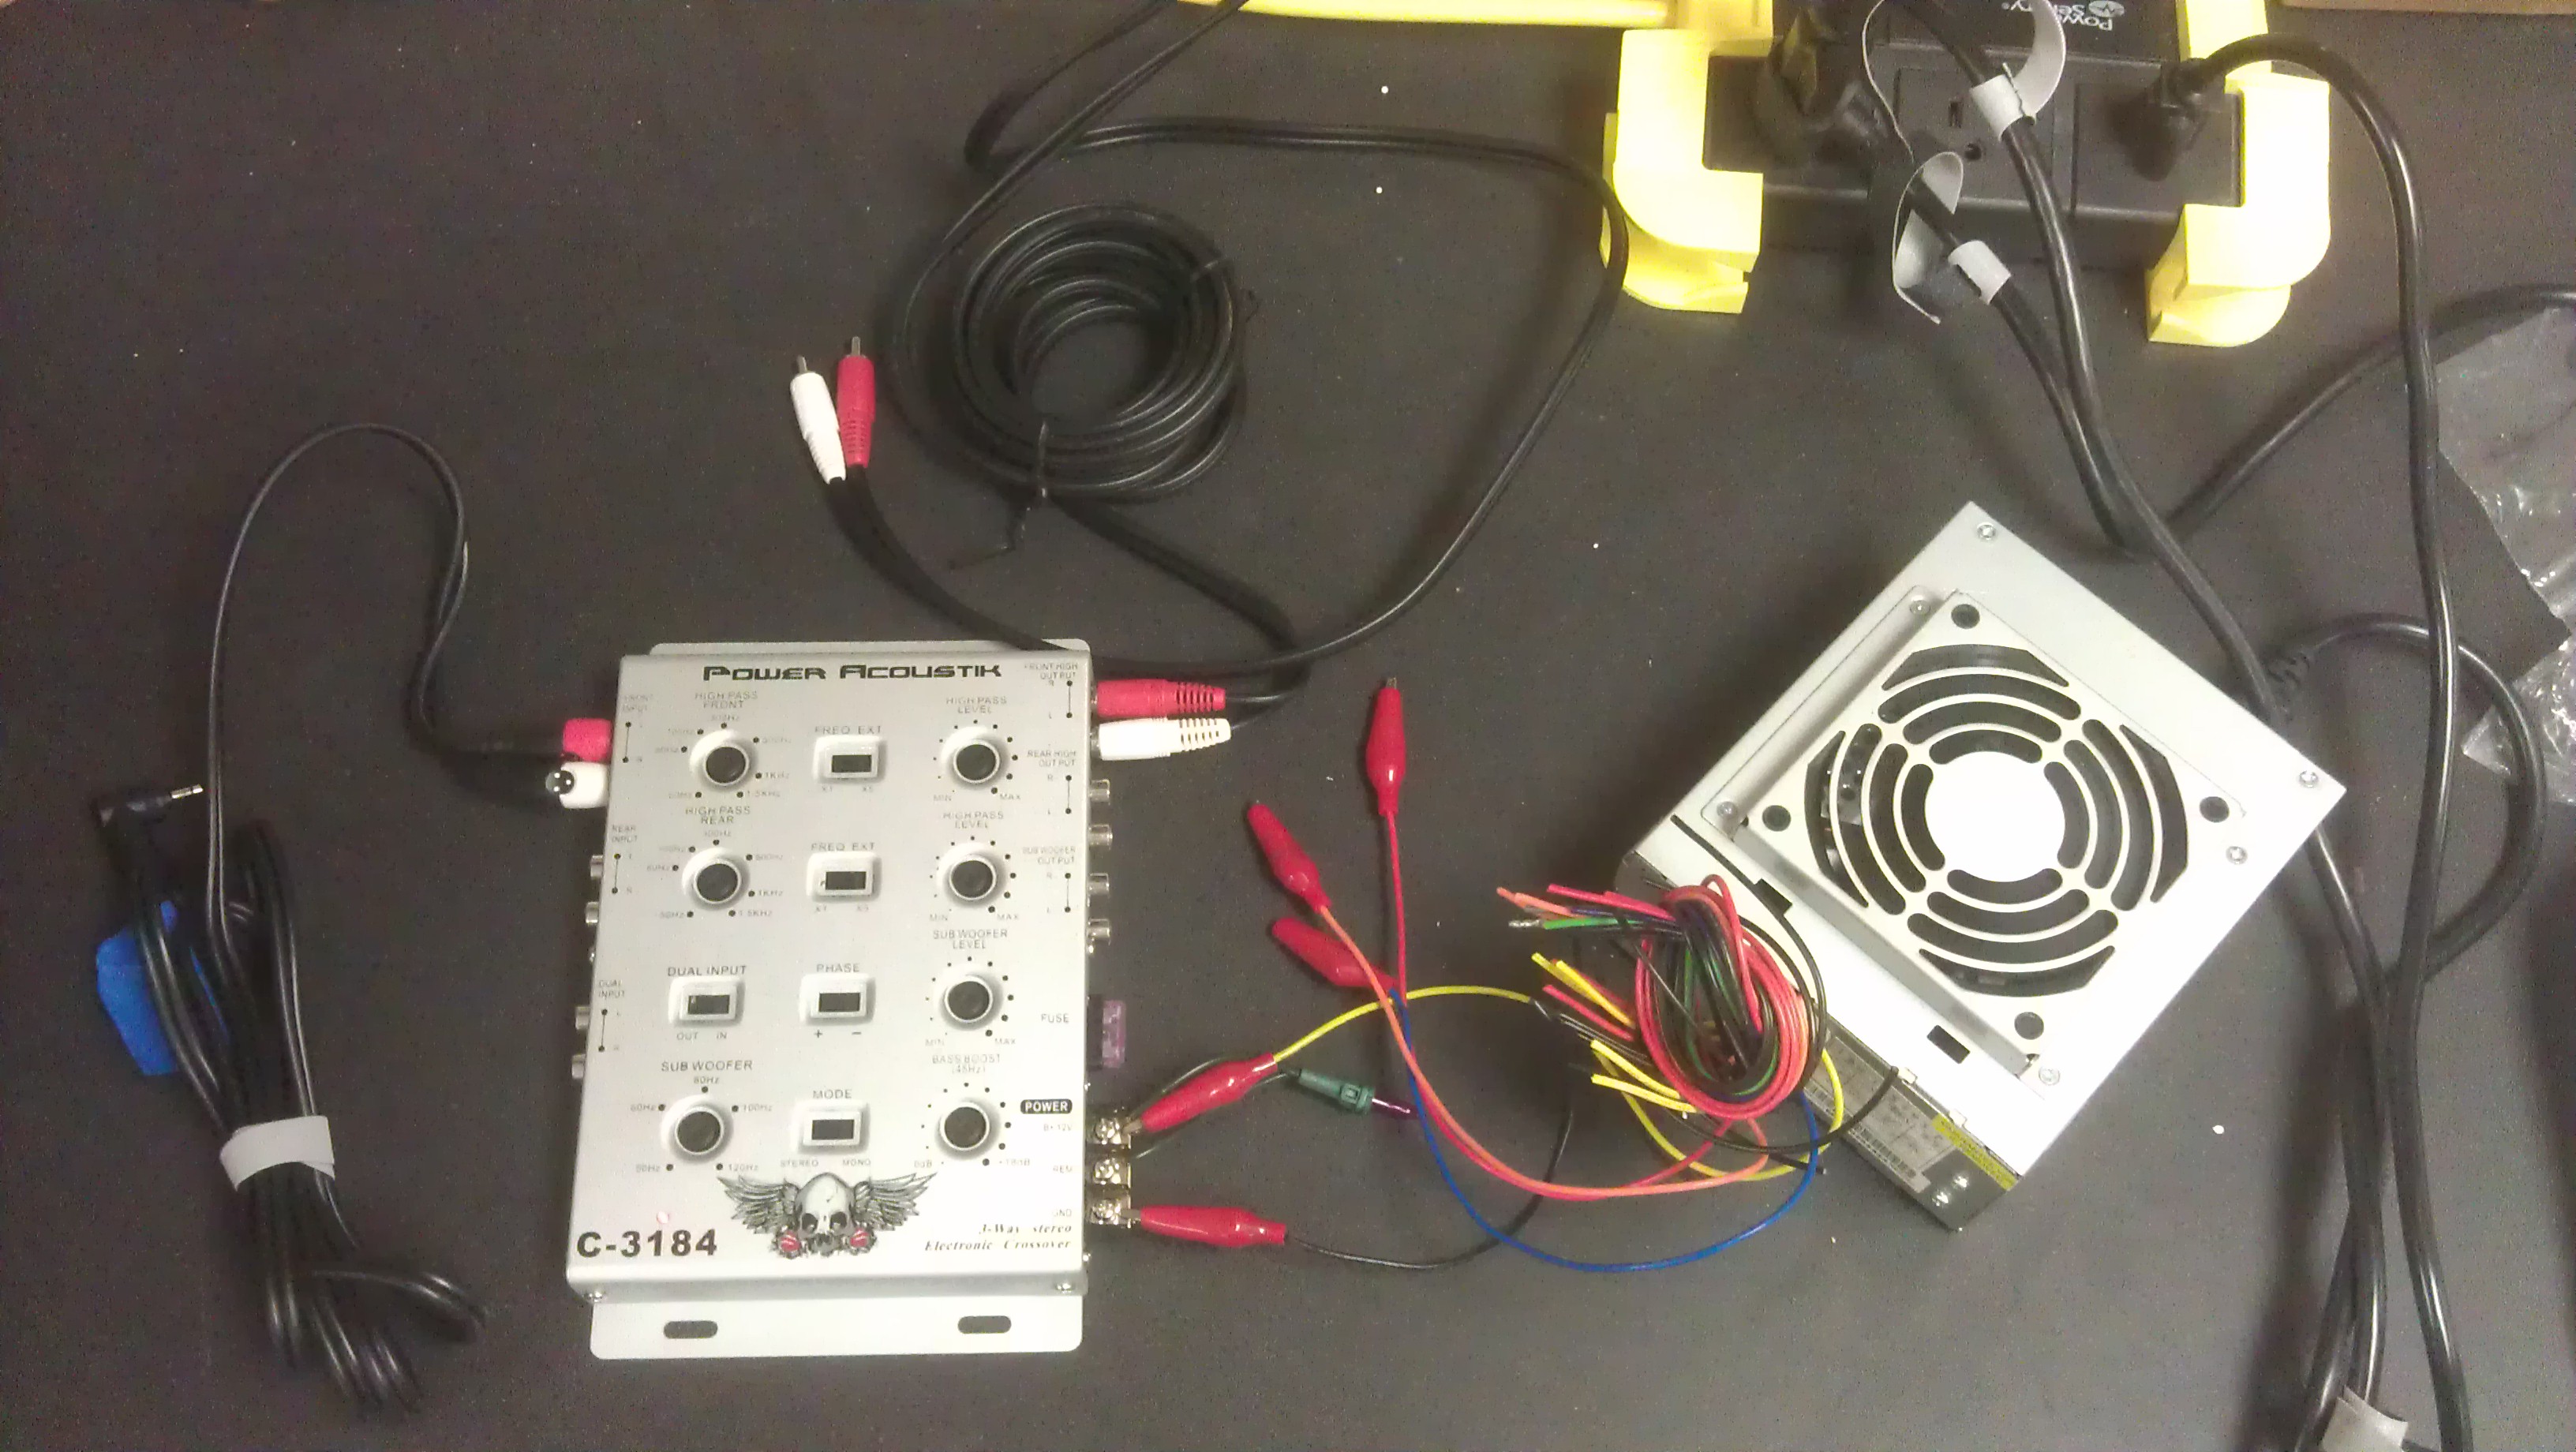
The only problem with this crossover is that it is designed for a car which means that it wants 12 V power. I just use an old computer power supply but you can buy adapters. Instructables has lots of projects that turn computer power supplies into useful bench top supplies.
Computer power supply gives 12 V
Picking the right song can be a challenge. I found that songs that lots of mid and high frequencies work well, and songs with long sustains seem to work better.
This is a pump action device. The mini-marshmallow is placed in front fo the 1/2 inch pipe. The bottom pipe is pulled out, and the marshmallows get pushed by the outside air pressure (sucked, if you will) deep into the 1/2 inch pipe. The bottom pipe is then forced back in, and the marshmallows are launched forward.
Parts:
2 feet 1/2-inch PVC (schedule 40 or 80) pipe
2 feet 2-inch PVC (schedule 40 or 80) pipe
2 feet 1 1/2 inch PVC (schedule 40 or 80) pipe
2 inch PVC connector sleave
2 inch to 1/2 inch adapter
2 1/2-inch right angle threaded bend
small disk of cardboard
duct tape
5 inches of thread
yarn
glue
PVC cement
mini-marshmallows
Construction
Cut out a piece of cardboard that is the same size as the 1 1/2 inch PVC's cross section. Use duct tape to firmly affix it to the end of the pipe. Wrap duct tape around the end until it is almost the same diameter as the 2 inch pipe. Apply glue to the tape (I used Gorilla Glue) and then wrap with yarn. It should make a snug fit into the pipe. Do the same a bit farther down. Repeat with yarn or use some self adhesive felt. I made snips in alternating sides so that it would lie flatter. Allow to dry.
Dry fit the PVC pipes together using the model above. The small right angle fittings also come in slip fitting rather than thread. I prefer the thread because then I can take it apart.
Place the thread across the 1/2 inch pipe between it and the right angle fitting to make sure that mini-marshmallows can't go all the way into the bent sections.
Once everything is working, use PVC cement to connect the joints.
I didn't come up with this design, I first saw it here. I just adopted it from Nerf darts to mini-marshmallows.
 Kossover, Zeke
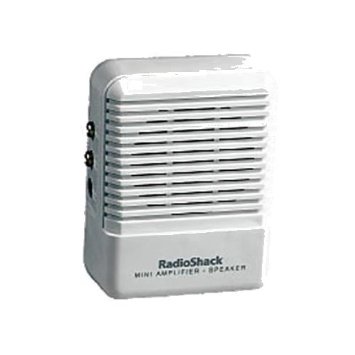
;)
;)
;)
;)
;)
;)
;)


;)
;)
;)
;)
;)
;)
;)
;)
;)
;)

;)
;)
;)
;)
;)
;)
;)

;)
;)
;)
;)
;)
;)
;)
;)

;)
;)
;)
;)

;)
;)