Converting a Computer (ATX) Power Supply into a Power Supply You Can Use in Lab
 Many PC desktop computers use a power supply known as ATX http://en.wikipedia.org/wiki/ATX . These computer power supplies are surprisingly well made, nearly bulletproof, since computer components are notorious for being easily damaged by getting voltages over or under what they are expecting. Manufacturers go to great lengths to make them durable and close to specs.
And the specs are often fantastic. Most can supply 3.3 V up to 10 A, 5 V up to 20 A, and 12 V up to 10 A. Most have several output wires, so you could have several students use the same supply as long as they together stayed under the current limits. Best of all, most will automatically turn themselves off if your circuit tries to draw too much current. Unplug the power supply, wait 30 seconds or so, and plug it back in, and the supply will be as good as new. No more replacing fuses!
Since power supplies rarely go bad in home computers and they are easy to extract, you can have a ready source of power supplies for more or less free. Surplus houses often sell them for only a few bucks each, if you’d like to go for new.
Their only real downside is that they don’t supply variable current, only fixed levels, but if 3.3 V, 5 V, and 12 V work for you, then they are great.
Materials
- ATX power supply
- IEC power cord

- scissors
- soldering iron
- solder
- electrical tape or shrink wrap
- wire stripper
- two incandescent holiday lights
- four alligator clips with vinyl jackets
;)
Assembly
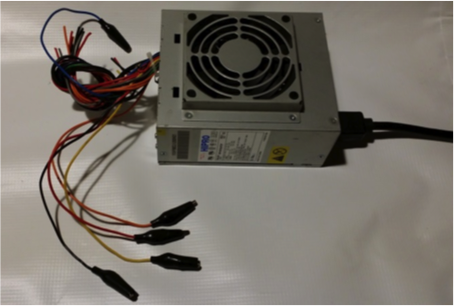
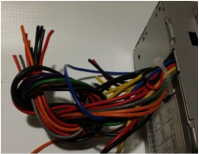 Cut off the connectors from the ends of the power supply using a pair of scissors. Leave the wires long, though. You can tie them into a knot to keep them out of the way.
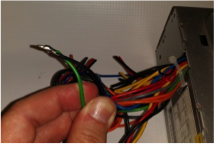 Find the green wire (there is usually only one) and a black wire (there are usually several). Strip the black and green wires and solder together. When the green wire is connected to ground – say by pressing a button – that signals the power supply to turn on. While you could connect a switch to the supply here, it is easier to turn it on permanently and turn it off by unplugging it.
 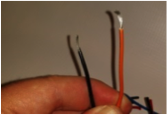 Some power supplies will not turn on unless they are powering something. That is, if nothing is connected to the wires, it won’t start. To solve that problem (and as bonus give a telltale that the power supply is working), strip the ends from two incandescent holiday lights and an orange wire and a black wire.
 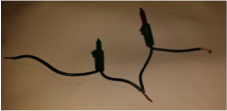 Solder the two incandescent bulbs together in series.
  Solder the pair to the orange black wires. Cover the connections with electrical tape or shrink wrap.
 - Strip one orange, one red, one yellow, and one black wire.
 Solder an alligator clip to each wire. Remember to slide the jacket up the wire BEFORE soldering the wire to the clip. Hold the clip and wiggle the jacket over the clip.
 - If you’d like, you can strip another set of black, orange, red, and yellow wires and solder on alligator clips. Most supplies can give enough current to run two stations. However, the wires are shortish this way, and if one group draws too much current, both groups will be shut off.
Colors
- Orange to black = 3.3 V
- Red to black = 5 V
- Yellow to black = 12 V
 Demos
Demos